
Chinese · Dinner
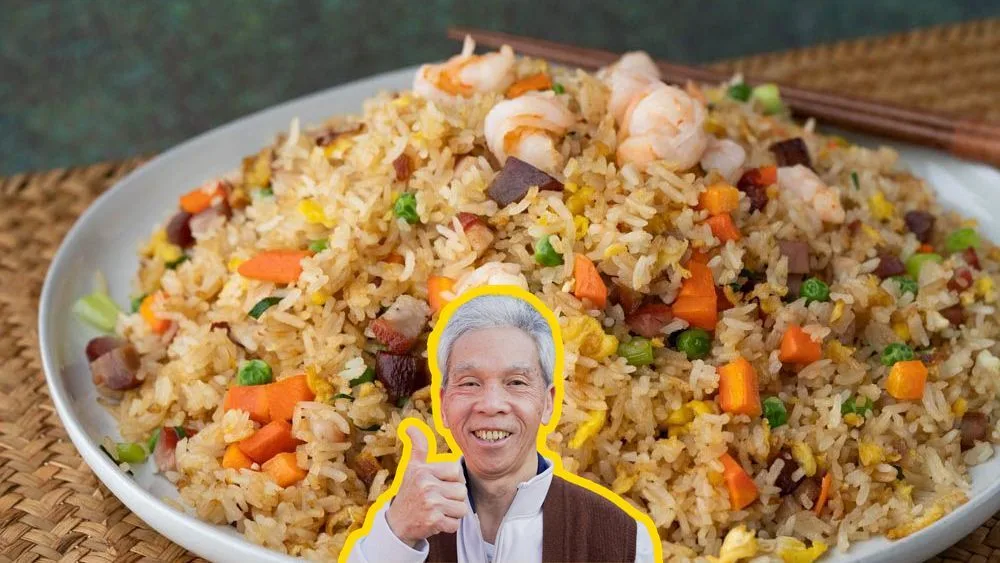
The Yangzhou Fried Rice My Dad's Made 100,000 Times
From the zcook collection
Learn how to make Yangzhou Fried Rice from a 2x James Beard Award Winning Chinese Chef with 60+ years of experience
- Dairy-free
- Chinese
- Dinner
- Yangzhou Fried Rice
- 揚州炒飯
- pork fried rice
- shrimp fried rice
- Total
- 40 min
- Prep
- 30 min
- Cook
- 10 min
- Serves
- 5
- Level
- Medium
Method6 steps · about 40 min
Step 1: Wash the 2 cups Thai rice three times in separate fresh water, draining the starchy water each time. Use the source’s 1 1/2 cups rice water as its starting guide for firm stir-fry rice, and adjust according to the chosen rice and rice cooker if needed; other rice types may require more water. Cook until the grains are fully cooked through yet firm, rather than dry or chalky. If still firm after the water is absorbed, add a little hot water and continue cooking. Fluff the cooked rice to release steam before frying. For the source’s optional day-ahead route, cool promptly and refrigerate until needed; do not leave cooked rice at room temperature overnight.
Step 2: Dice the carrots (2 oz) and cooked char siu (5 oz) (or chosen ham/Spam) into medium cubes. Chop the scallions (2), keeping whites and greens separate. Halve the shrimp (4 oz) lengthwise. Beat the 2 eggs and mix in the single 1/2 tsp egg-salt (1/2 tsp) supply; do not add this egg salt again during frying.
Step 3: Bring the separate 2 cups blanching water to a boil in a medium pot. Add the prepared carrots from step 2 and the peas; cook about 30–40 seconds. Add the halved shrimp from step 2 and cook for the source guide of about 3 minutes, until the shrimp are firm and opaque and the vegetables are cooked. Drain and set aside for immediate frying.
Step 4: Heat the wok on high for about 1 minute, then add the separate 1 tbsp initial cooking oil. When it ripples, pour in the already salted beaten eggs from step 2. Cook about 10–15 seconds, then add the cooked rice from step 1. Break up the egg and rice clumps and stir-fry over high heat; the following step continues this same rice-and-egg frying phase. Add no further egg salt.
Step 5: After a total of about 2 1/2–3 minutes frying the rice and eggs begun in step 4, lower the heat and add the distinct 1/2 tsp fried-rice salt and 2 tbsp light soy sauce. Push the rice to the wok edges and heat the prepared diced char siu from step 2 in the centre, then mix it into the rice and cook about 1 1/2 minutes. Add the drained vegetables and cooked shrimp from step 3, raise the heat and toss with the separate 2 tbsp finishing oil. Add both prepared scallion whites and greens from step 2 and mix. Continue until the egg is fully cooked and everything is hot through; if using chilled leftover rice, heat to 74°C/165°F. Remove from the heat.
Step 6: Taste to adjust the flavors and plate once it's to your taste! This is usually served in a large serving bowl or plate and everyone can take the amount they want.
Photos (1)
Comments
0 threadsSign in to join the discussion.

No comments yet. Start the discussion.