
Japanese · Dinner
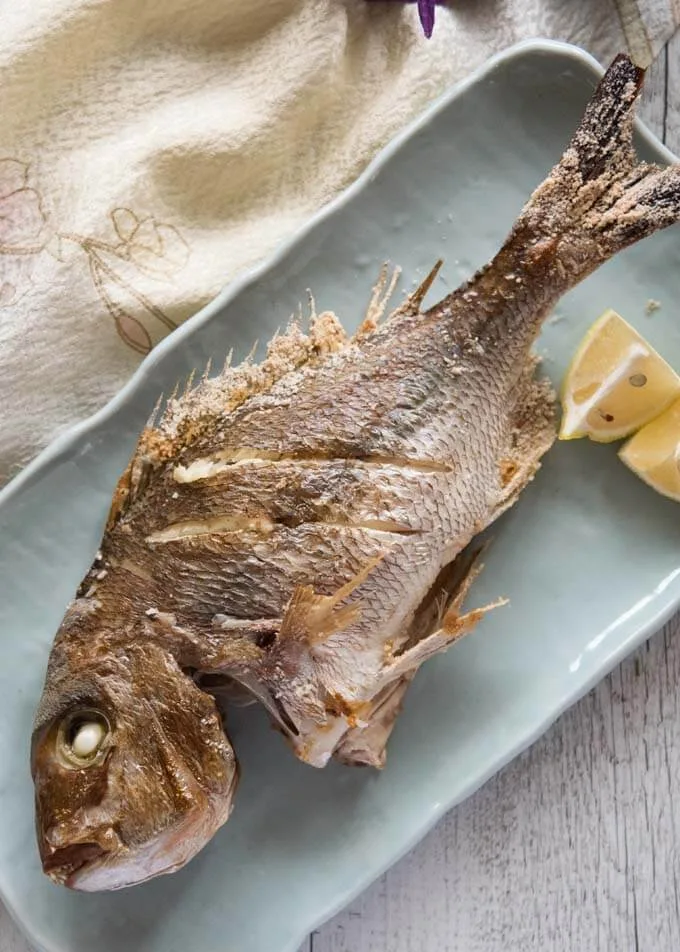
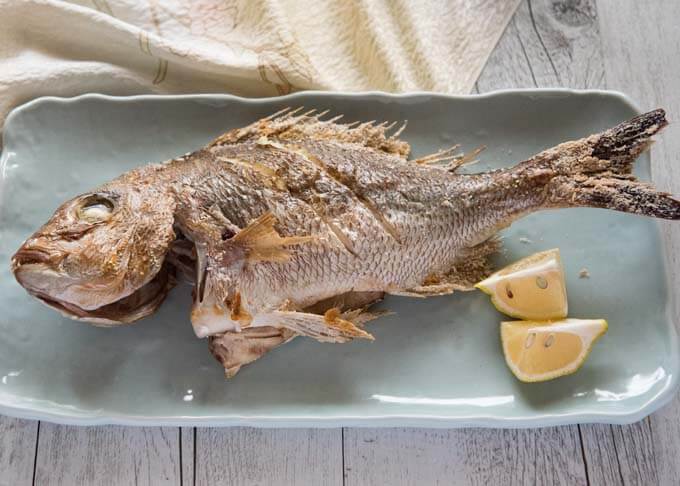
Japanese-style Grilled Snapper
From the zcook collection
A whole salt-seasoned snapper shaped on thin metal skewers, with optional salted-fin decoration. Choose the elevated BBQ, broiler or 220°C oven route and serve with optional lemon wedges.
- Gluten-free
- Dairy-free
- Japanese
- Main
- Prep
- 10 min
- Serves
- 1 whole grilled snapper; 2–3 portions
- Level
- Hard
Method32 steps
Step 1: Use one whole cleaned 500 g snapper with its head and tail intact, about 35 cm long. Pat it dry and sprinkle all ½ tbsp seasoning salt over both sides. Leave it in the refrigerator for 1 hour for the salt to penetrate.
Step 2: Make a couple of diagonal incisions in the thickest flesh on the left side of the salted fish from step 1. This will be the side facing up when served. Have two long, thin metal skewers ready; bamboo skewers are unsuitable for this grilling method.
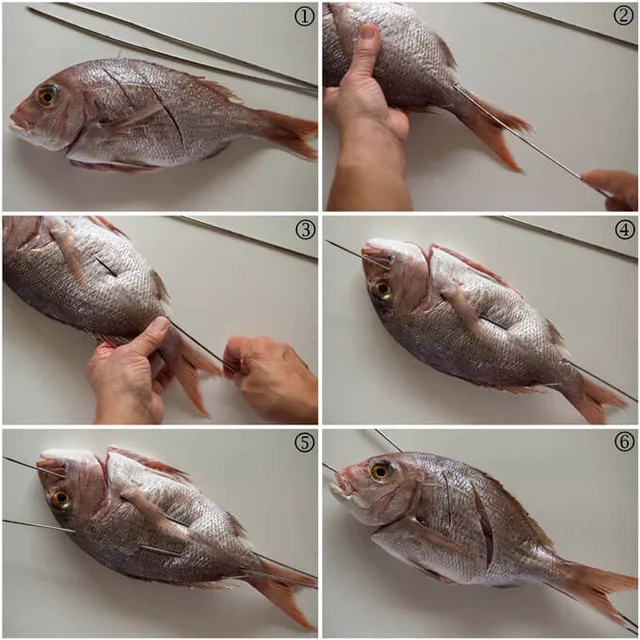
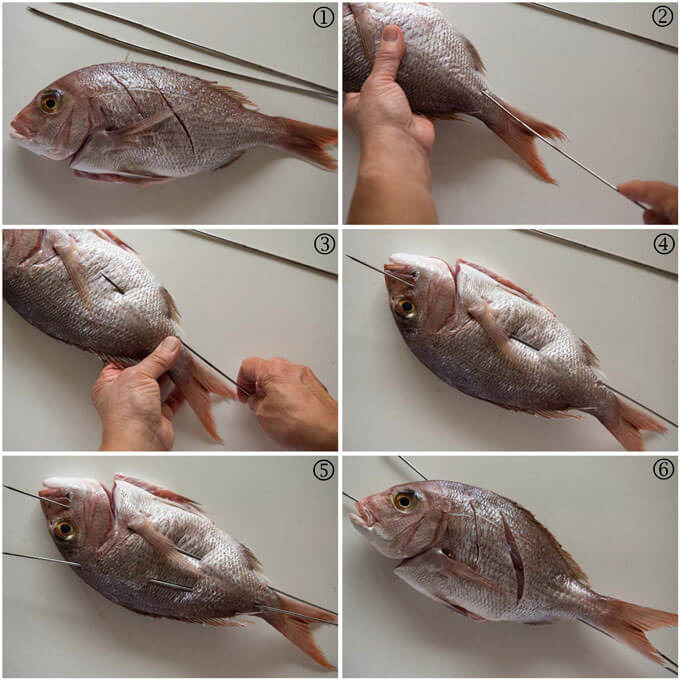
Step 3: For the curved presentation, hold the scored fish from step 2 with the tail to your right and the belly facing away from you. The following steps describe right-handed skewering; reverse your hands if needed.
Step 4: Insert the first metal skewer into the flesh near the tail, below the backbone. Push almost vertically toward the other side, past the backbone.
Step 5: Before the skewer pierces the opposite skin, lift its tip so it emerges on the same side about a quarter of the way along the body. Bend the fish gently to help guide the skewer.
Step 6: Push the same skewer in again at the midpoint below the backbone, repeating the threading motion and aiming to emerge just below the eye.
Step 7: Insert the second metal skewer similarly, this time above the backbone. Let it emerge between the body and head where the bones are firm.
Step 8: Check the skewered fish from step 7: the tail ends of the two skewers should be close together and their head ends farther apart, holding the head and tail slightly curved upward.
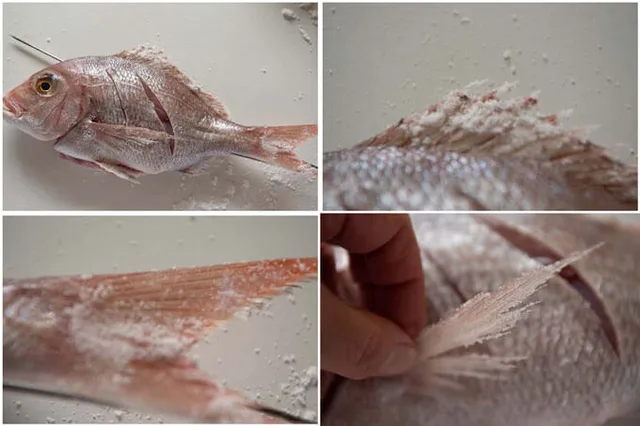
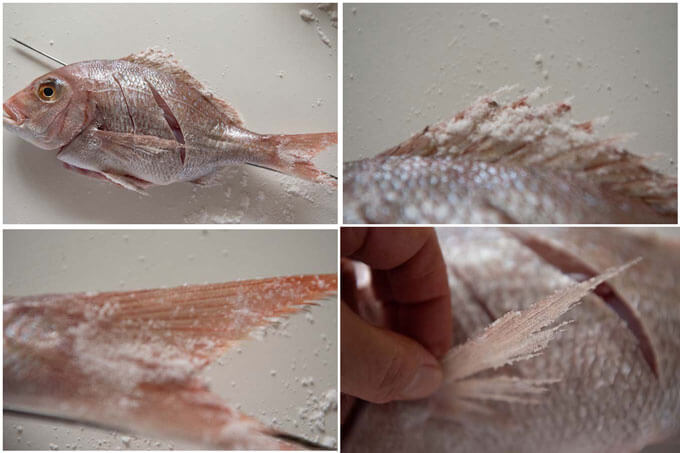
Step 9: Optional fin decoration: leave the fish from step 8 scored-side up on a cutting board. If decorating, pull the front of the dorsal fin and spread it for steps 10–12. If omitting decoration, leave the fins as they are and keep the same skewered fish ready for the cooking-route choice.
Step 10: If decorating the fins, use the separate fin-decoration salt to generously coat the exposed dorsal fin so it stays spread. The 1–1½ tbsp is a guide for all the fins together; use additional decoration salt only if needed.
Step 11: If decorating, press more of the same fin-decoration salt onto the other side of the dorsal fin with your fingertips.
Step 12: If decorating, coat the tail and other fins, including the pectoral fins, with the same decoration salt.
Step 13: Leave the right pectoral fin undecorated if desired, since that side will face down. Keep the finished skewered fish ready for your chosen cooking route.
Step 14: Choose ONE cooking route for the prepared fish: BBQ steps 14–21, broiler steps 22–27, or oven steps 28–32. For the BBQ route, use high heat and a slotted grill, with the fish suspended about 15 cm above the heat.
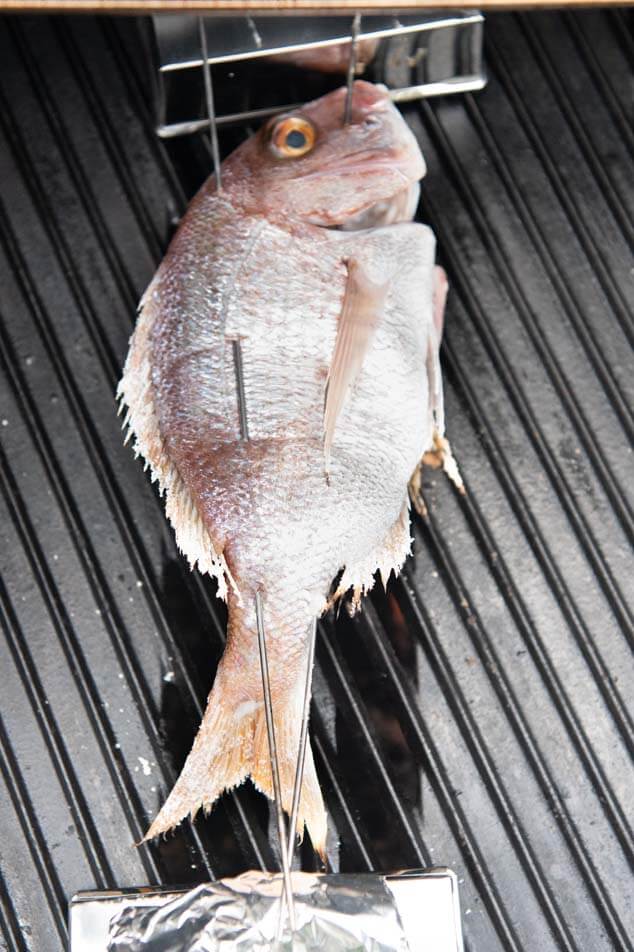
Step 15: For the BBQ route, place stable, heat-safe, nonflammable supports wrapped in foil on either side of the grill. They must hold the skewers securely and keep the fish about 15 cm above the heat.
Step 16: For the BBQ route, rest both ends of the metal skewers on the supports. Suspend the whole prepared fish from step 13 with its scored left side facing down toward the heat, without letting the body touch the grill.
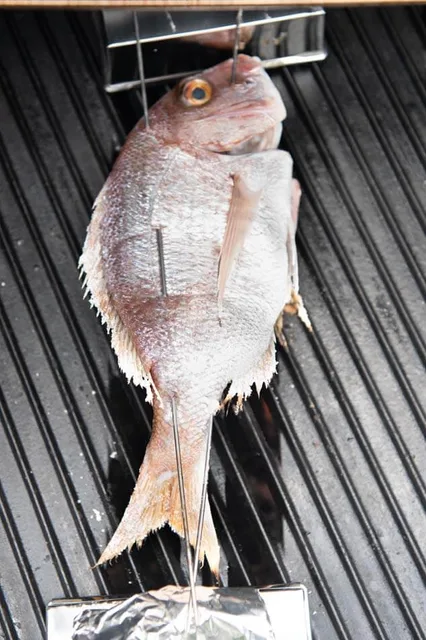
Step 17: For the BBQ route, cook the first side for about 5–6 minutes, until the surface has browned patches and the flesh inside the incisions is cooking through. Fish size and heat affect the time; the second side is cooked next.
Step 18: For the BBQ route, if a lifting pectoral-fin tip gets too close to the heat, you may carefully shield its tip with a small piece of foil. Continue with the same fish from step 17.
Step 19: For the BBQ route, turn the same fish from step 18 and cook the other side for about 4 minutes. Continue as needed until the thickest flesh reaches 63°C and is opaque and flakes easily. Remove it from the heat.
Step 20: For the BBQ route, put the fully cooked fish from step 19 on a clean cutting board, scored-side up. While it is still hot, carefully twist and remove each metal skewer.
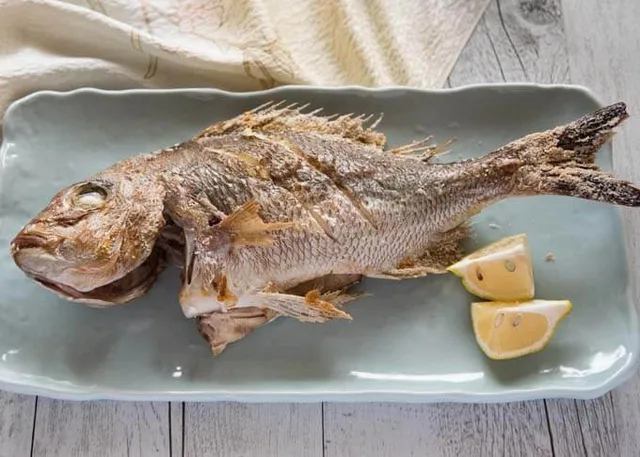
Step 21: For the BBQ route, transfer the complete fish from step 20 to a serving plate with its head to the left and scored side up. Serve with optional lemon wedges. This route is finished; skip the broiler and oven routes.
Step 22: Alternative broiler route ONLY: use the prepared fish from step 13 instead of the BBQ route. Position it about 10 cm below the overhead heat.
Step 23: For the broiler route, turn the broiler to its maximum heat.
Step 24: For the broiler route, use a tray at least 5 cm deep, slightly narrower than the metal skewers are long, so both ends can rest securely on its edges.
Step 25: For the broiler route, secure the two skewers of the prepared fish from step 13 on the tray edges, keeping the body clear of the tray bottom. Face the scored side upward toward the heat.
Step 26: For the broiler route, place the tray and suspended fish from step 25 under the broiler, about 10 cm below the heat.
Step 27: For the broiler route, grill the scored side of the fish from step 26 for about 5–6 minutes, shielding a fin tip with foil if needed. Turn and cook the other side for about 4 minutes, continuing until the thickest flesh reaches 63°C and is opaque and flakes easily. Remove to a clean board, twist out the skewers while hot, and plate head to the left with optional lemon wedges. This route is finished; skip the oven route.
Step 28: Alternative oven route ONLY: use the prepared fish from step 13 instead of either grill route. Preheat the oven to 220°C.
Step 29: For the oven route, gently scrunch a 60 cm length of foil, then spread it over a baking tray large enough for the skewered fish.
Step 30: For the oven route, place the complete prepared fish from step 13 on the foil-lined tray, scored left side up.
Step 31: For the oven route, cook the fish from step 30 at 220°C for about 20 minutes. Check the thickest flesh and continue as needed until it reaches 63°C, turns opaque and flakes easily; the time varies with fish size.
Step 32: For the oven route, put the fully cooked fish from step 31 on a clean board, scored-side up. Carefully twist out the skewers while hot, then transfer the fish to a serving plate with its head to the left. Serve with optional lemon wedges. This route is finished.
Photos (1)
Comments
0 threadsSign in to join the discussion.
No comments yet. Start the discussion.