
Japanese · Pantry
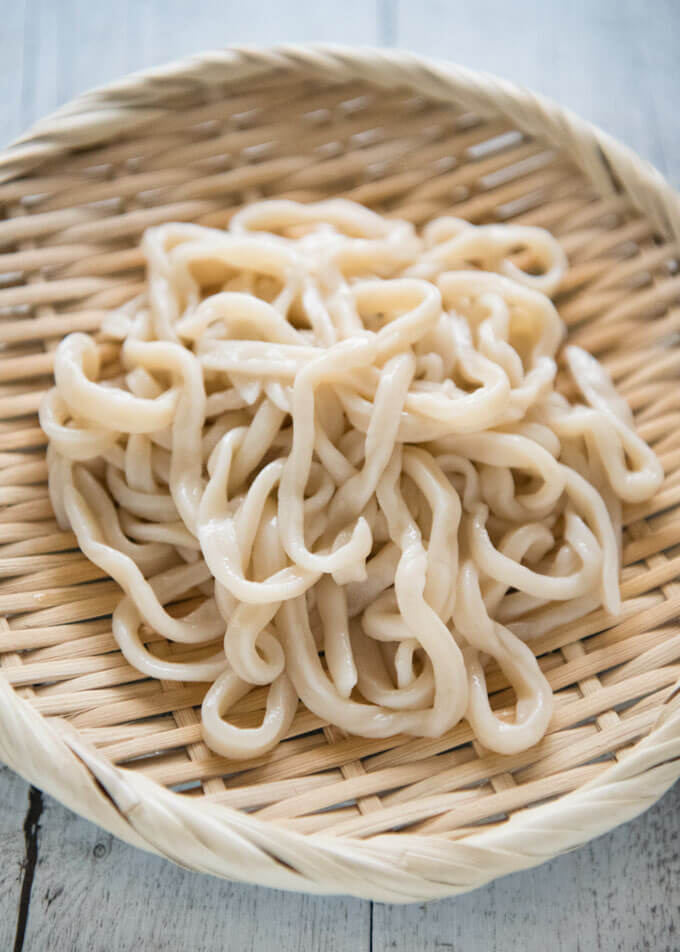
Home-made Udon Noodles
From the zcook collection
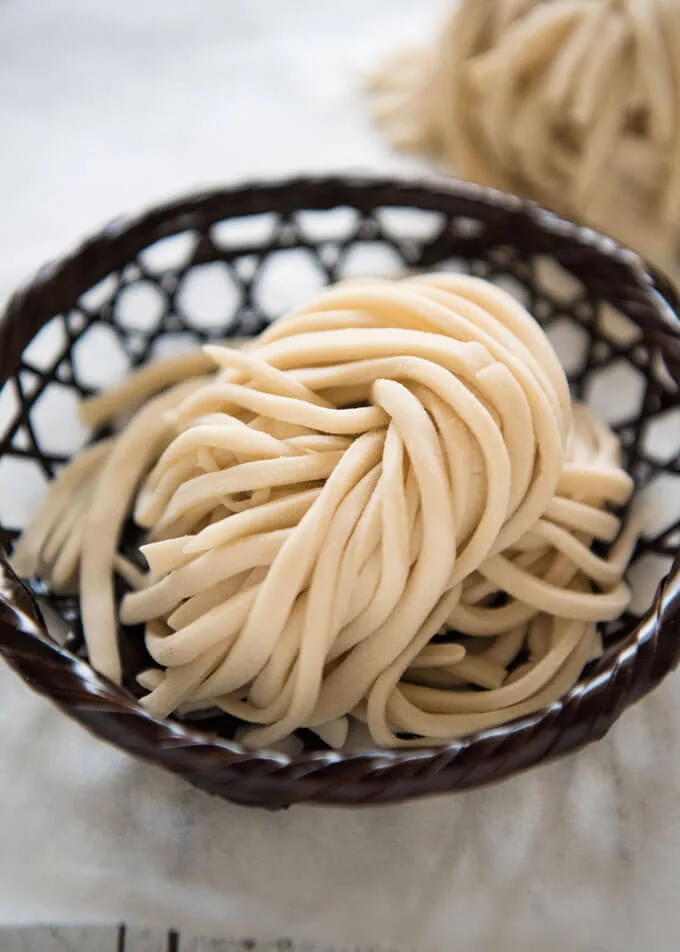
Plain homemade udon from equal parts plain and bread flour, salt and water. Knead, rest, roll and cut the dough, then choose to cook the noodles now or store them uncooked for later use.
- Vegan
- Dairy-free
- Japanese
- Pantry
- Udon
- Prep
- 20 min
- Serves
- About 300 g raw udon; 3 standard noodle portions
- Level
- Medium
Method21 steps
Step 1: Dissolve all 8 g salt in the 100 ml dough water.
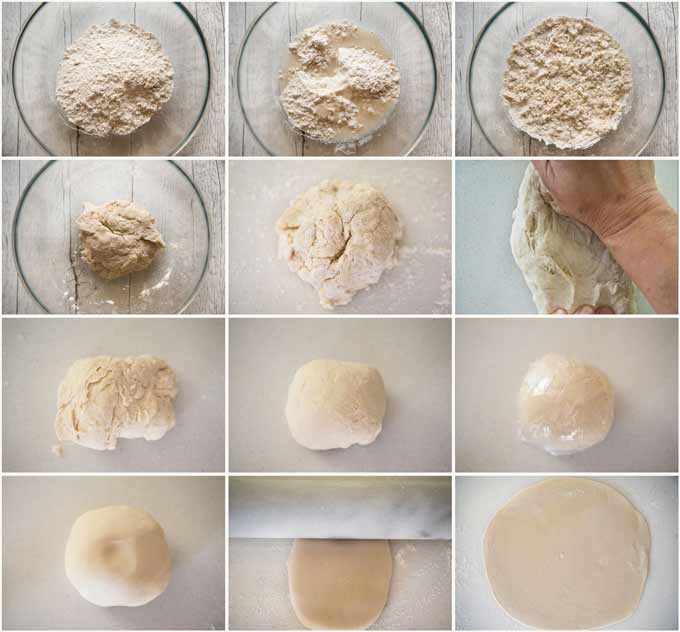
Step 2: Put all 100 g plain flour and 100 g bread flour into a bowl. Add half of the salt water from step 1. Mix vigorously by hand until there are only small flour lumps. Keep the other half of the salt water aside.
Step 3: Add the remaining half of the salt water from step 1 to the flour mixture from step 2 and mix well, breaking up large lumps.
Step 4: Gather the complete flour mixture from step 3 into a ball, pressing and folding the outer crumbs into the center until they hold together.
Step 5: Sprinkle a little of the extra dusting flour on a clean work surface. Transfer the dough ball from step 4 onto it.
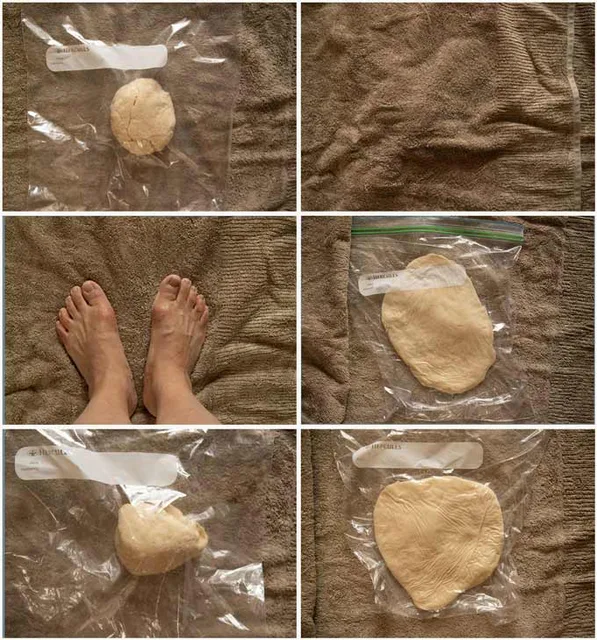
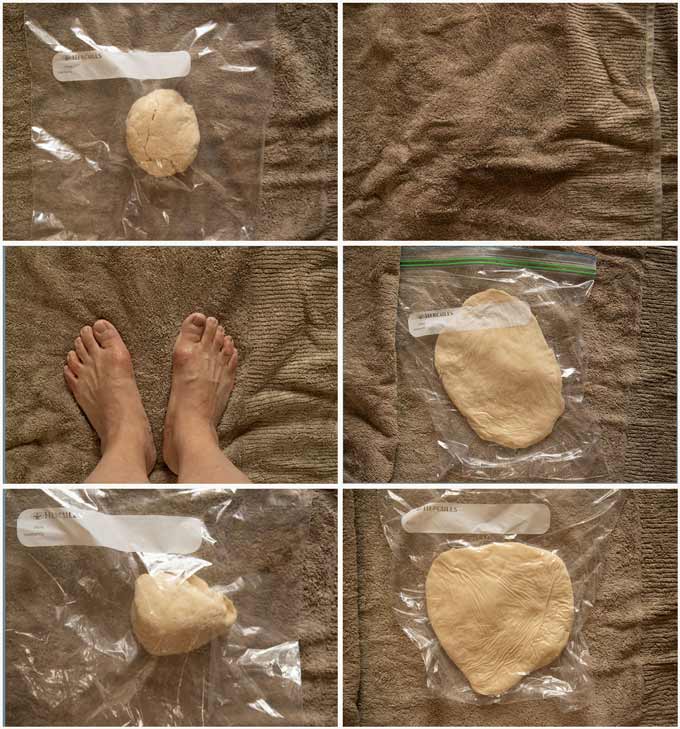
Step 6: Knead the dough from step 5 with the base of your palm, stretching and folding it repeatedly for about 5 minutes, until its surface is reasonably smooth. Alternatively, seal the dough in a large zip-lock bag with the air removed, place it between folds of a clean towel on the floor and step on it. Reform it into a ball and repeat the stepping until smooth; choose this instead of hand-kneading.
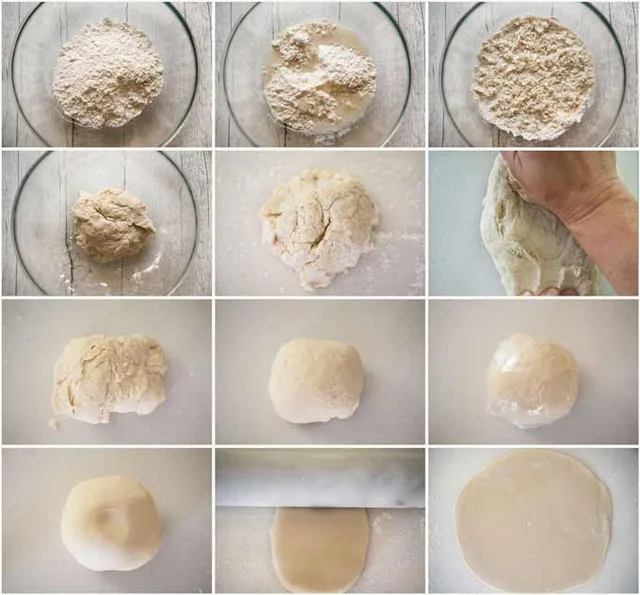
Step 7: Form the smooth dough from step 6 into a ball and wrap it in cling wrap. Rest at room temperature for 30–60 minutes, until a finger indentation springs back about one-third of the way. A cool room may require the full hour.
Step 8: Dust the work surface with a little more of the extra flour. Unwrap the rested dough from step 7 and put it on the dusted surface.
Step 9: Starting at one edge of the rested dough from step 8, press down with the rolling pin, moving the pin across the dough to flatten it gradually.
Step 10: Shape the flattened dough from step 9 into a square with rounded corners. Roll it out, turning it 90 degrees between passes. Dust with a little extra flour as needed to prevent sticking.
Step 11: Continue rolling the dough from step 10 until it is about 3 mm thick and roughly 25–30 cm square.
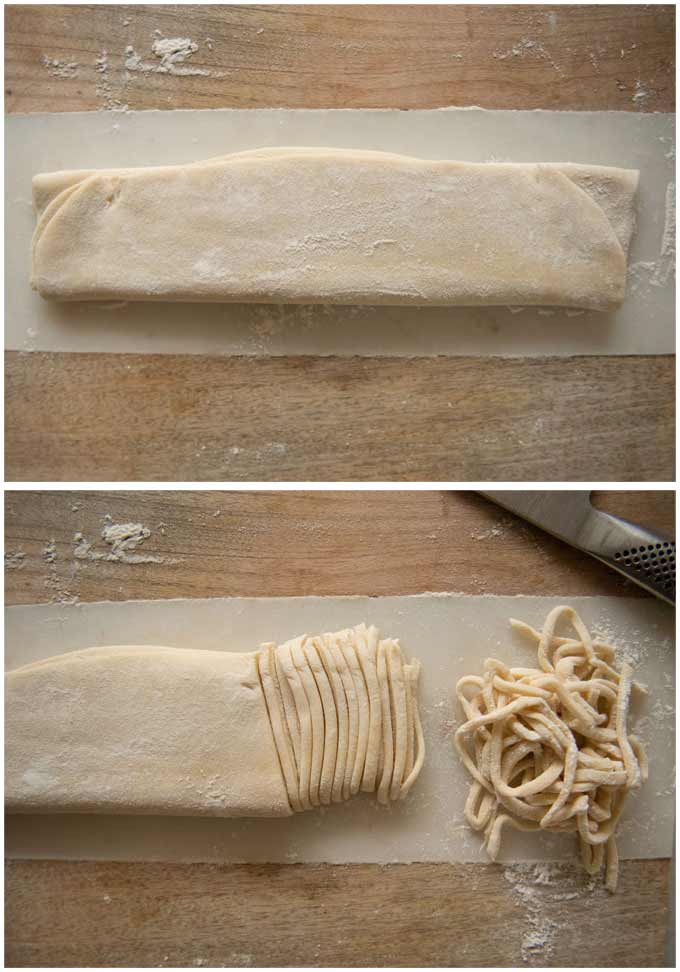
Step 12: Dust the thin sheet from step 11 sufficiently with extra flour to stop its layers sticking. Fold it a couple of times in the same direction into a narrow strip.
Step 13: Place the folded dough from step 12 lengthwise on a cutting board. Cut across it into strips about 3 mm wide, working from the edge most comfortable for your knife hand.
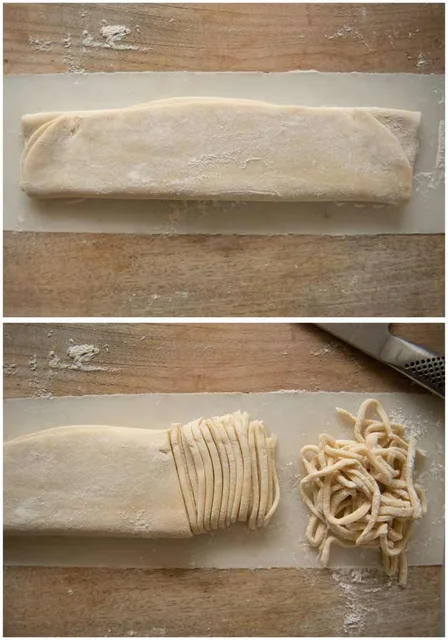
Step 14: After every few cuts, loosen the noodle strips from step 13 and toss them with a little extra flour to prevent sticking. Finish cutting the whole sheet. Choose either cooking now in steps 15–18, or storing the uncooked noodles in steps 19–21.
Step 15: Cooking-now route: bring plenty of fresh water to a boil in a large pot, enough for the noodles to move freely.
Step 16: Cooking-now route: add all the raw noodles from step 14 to the boiling water from step 15. Boil for about 10–12 minutes, until cooked through and chewy. Do not stir immediately after adding them, as the fresh strands can break. Watch the water throughout and follow step 17 if bubbles rise too high.
Step 17: During the cooking in step 16, if bubbles threaten to overflow, add a little cold water to bring them down. Lower the heat slightly while maintaining a lively boil, and finish the noodles within the same cooking phase.
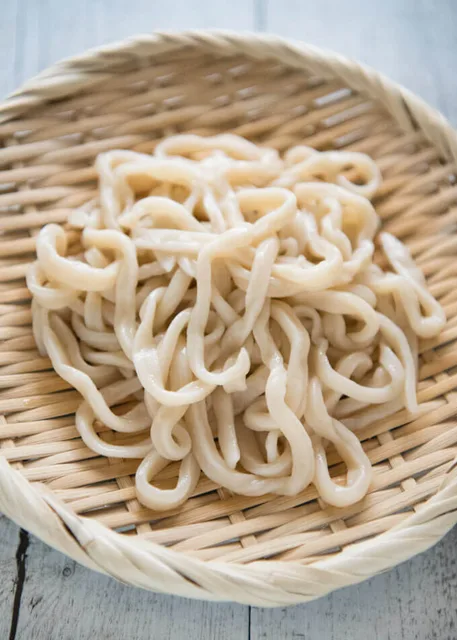
Step 18: Cooking-now route: drain the fully cooked noodles from step 17, discarding their cooking water. Rinse in cold water until completely cool and no longer sticky, then drain well in a sieve. The plain noodles are ready to use in your chosen dish. Stop here; steps 19–21 describe the alternative raw-noodle storage route.
Step 19: Raw-noodle storage route, instead of steps 15–18: for refrigeration, put the uncooked noodles from step 14 into covered serving portions and refrigerate promptly. When using them, boil in plenty of fresh water until cooked, then rinse and drain as in steps 15–18. Refrigerated noodles may need slightly longer than the fresh 10–12-minute guide. Choose refrigeration OR freezing in step 20.
Step 20: Raw-noodle storage route: for freezing instead of step 19, divide the uncooked noodles from step 14 into portions of about 100 g and seal each in its own zip-lock bag. Alternatively, freeze the portions as separate flat mounds in a covered container before transferring them to bags. Freeze for about 1 month.
Step 21: To use the frozen portions from step 20, boil the amount needed directly from frozen in plenty of fresh water, without thawing. Cook until done; frozen noodles take a few minutes longer than the fresh 10–12-minute guide. Control rising bubbles as in step 17, then drain, cold-rinse and drain well as in step 18.
Photos (1)
Comments
0 threadsSign in to join the discussion.
No comments yet. Start the discussion.