
Italian · Preparation
How to Make Ravioli
From the zcook collection
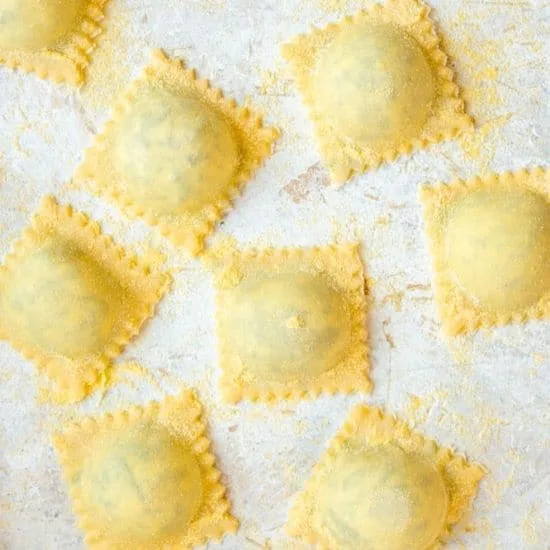
A ravioli-shaping tutorial using separately prepared egg pasta dough and a ready filling. Choose a mould, stamp or freehand route to produce uncooked ravioli for later cooking.
- Italian
- Pasta
- Ravioli shaping
- Preparation
- Prep
- 30 min
- Serves
- Uncooked ravioli from 1 batch of prepared egg pasta dough; number varies with size
- Level
- Hard
Method19 steps
Step 1: Start with a separately prepared, rested batch of egg pasta dough and a ready smooth filling that is not wet or rough. Roll the dough into thin sheets, about setting 7 on a nine-setting pasta machine, or as thin as you can with a rolling pin. Keep unused sheets covered. Choose one shaping route: ravioli maker (steps 2–8), stamp (steps 9–14), or freehand cutter (steps 15–19). Dust the surface and selected tool lightly with semolina; if using a ravioli maker, dust the mould too.
Step 2: Ravioli-maker route only: lay one of the prepared thin pasta sheets over the dusted mould, leaving enough overlap around every edge. Keep the remaining sheets covered.
Step 3: Ravioli-maker route only: gently press the plastic dimpler into the sheet to make shallow filling pockets, without tearing the pasta.
Step 4: Ravioli-maker route only: put a small heap of the separately prepared filling into each pocket, usually about 1 heaped teaspoon per raviolo. Keep the borders clean and avoid overfilling.
Step 5: Ravioli-maker route only: cover the filled base with another prepared thin sheet. Press gently around the filling to push out trapped air and seal the pasta layers.
Step 6: Ravioli-maker route only: roll the small roller over the filled mould until the edges are cut cleanly.
Step 7: Ravioli-maker route only: remove excess dough around the mould, then carefully turn it over to release the shaped ravioli.
Step 8: Ravioli-maker route only: check that the released uncooked ravioli are sealed. Repeat steps 2–7 with the remaining sheets and filling as needed. Set finished ravioli on a semolina-dusted board and cover with a clean towel if cooking within a couple of hours, or freeze in a single layer for longer storage. Stop here: the stamp and freehand routes are alternatives. These ravioli still need to be cooked separately.
Step 9: Stamp route only: lay a prepared thin pasta sheet on a clean surface lightly dusted with semolina. Keep the remaining sheets covered.
Step 10: Stamp route only: press the stamp lightly onto the sheet to mark each raviolo’s outline without cutting through it.
Step 11: Stamp route only: place a small heap of the prepared filling in the centre of each mark, usually about 1 heaped teaspoon per raviolo, keeping the marked borders clear.
Step 12: Stamp route only: lay another prepared thin sheet over the filled base. Cup your hands around each mound and press the borders lightly to seal while pushing out air.
Step 13: Stamp route only: if any dry edges will not stick, lift them slightly, apply a tiny dab of sealing water and press the pasta layers together again.
Step 14: Stamp route only: cut each sealed raviolo with the stamp. Repeat the laying, marking, filling, sealing and stamping process with the remaining sheets and filling as needed. Lay the uncooked ravioli on a semolina-dusted board, cover briefly or freeze in one layer. Stop here: the freehand route is an alternative. Cook the shaped ravioli separately later.
Step 15: Freehand route only: lay a prepared thin pasta sheet on a semolina-dusted surface. Place small heaps of the separately prepared filling about two finger-widths apart, leaving clear borders between them.
Step 16: Freehand route only: check the spaced filling mounds. About 1 heaped teaspoon per raviolo is usually enough, but adjust to the intended size and avoid overfilling.
Step 17: Freehand route only: lay another prepared thin sheet over the filled base. Cup around each mound, pressing the borders gently and pushing out trapped air. Use tiny dabs of sealing water only if the pasta edges are too dry to stick.
Step 18: Freehand route only: use a pasta wheel to trim the outside edges and cut between the sealed filling mounds into individual squares. A pizza cutter or knife can do the same job if you do not have a pasta wheel.
Step 19: Freehand route only: a pizza cutter or knife makes straight rather than crimped edges. Check the seals and repeat steps 15–18 with remaining sheets and filling as needed. Keep the uncooked ravioli on a semolina-dusted board, covered if cooking within a couple of hours, or freeze flat for longer storage. This completes shaping; choose a separate cooking and sauce recipe for your filling.
Photos (1)
Comments
0 threadsSign in to join the discussion.
No comments yet. Start the discussion.