
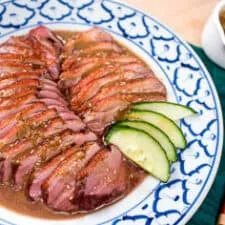
Thai · Dinner
Chinese Roast Duck Thai Style (MK Duck) เป็ดย่าง MK
From the zcook collection
Thai-style Chinese roast duck breasts with five-spice seasoning and a fragrant soybean, coconut and honey gravy.
- Dairy-free
- Thai
- Dinner
- Prep
- 20 min
- Cook
- 35 min
- Serves
- 2–3 servings
- Level
- Hard
- Energy
- 520 kcal
Method22 steps
Step 1: Remove the tender and silver skin from the duck breasts as much as possible. Reserve the tenders to cook separately.
Step 2: Trim off excess skin/fat around the edges of the breasts.
Step 3: Score the duck skin shallowly on a diagonal about 1 cm apart, making sure not to cut through to the meat.
Step 4: Make the dry rub by combining five-spice powder (1/2 tsp), brown sugar (1 tsp), salt (¼ tsp) and ginger powder (¼ tsp).
Step 5: Sprinkle the rub evenly onto the meat part of the duck only; try not to let the rub touch the skin. Use any leftover rub on the tenders. Flip the rubbed duck meat side down on a plate and pat the skin dry.
Step 6: If using optional red colouring, mix the 3–4 drops with 1 tsp water and a pinch of salt and brush onto the skin. Otherwise leave the skin uncoloured and dry.
Step 7: Marinate the duck uncovered in the refrigerator for at least 45 minutes, or up to one day, to season the meat and dry the skin.
Step 8: Meanwhile make the gravy.
Step 9: Pound peppercorns until fine in a mortar and pestle.
Step 10: Add garlic (3 cloves), ginger (1 piece), cilantro stems and pound into a fine paste.
Step 11: Add taojiew (2 Tbsp) and five spice powder (½ tsp) and mash everything together.
Step 12: In a small pot, add a little bit of oil and the herb paste and saute on low heat for about 2 minutes until aromatic and thickened.
Step 13: Deglaze with chicken stock, then add all remaining ingredients, whisking to break up the herb paste.
Step 14: Simmer for about 5 minutes.
Step 15: Taste and adjust seasoning, adding more dark/black soy sauce as needed to adjust the colour.
Step 16: Stir in sesame seeds, and when you're ready to serve stir in cilantro leaves.
Step 17: Preheat the oven to 400°F (205 °C).
Step 18: Dry the breasts on paper towel, trying your best not to let any of the juices or the marinade touch the skin.
Step 19: Heat a flat skillet over medium heat just briefly (don't let it get too hot), then add the duck skin-side down. Let the duck fat from the skin render slowly over medium heat. As duck fat collects in the pan, you can pour this off into a bowl and save it for cooking if you wish.
Step 20: Sear duck for about 5-6 minutes or until the skin has browned slightly and much of the fat has rendered off. (Tip: I used a non-stick pan, but if using a stainless steel pan, the skin might feel like it's sticking in the beginning. Don't worry, it should release after the skin is browned, with a bit of help from a spatula.
Step 21: Transfer the seared duck skin-side up to a rack over a foil-lined baking sheet. Roast at 400°F (205°C) until the thickest part reaches 165°F (74°C). Begin checking after 12–15 minutes; the time needed depends on breast size, so use a meat thermometer.
Step 22: Rest the cooked duck about 10 minutes before slicing thinly. Spoon over the finished gravy to taste and serve with cooked jasmine rice or egg noodles. The gravy batch makes enough for four breasts; these two breasts may not need all of it, so reserve the remainder.
Photos (1)
Comments
0 threadsSign in to join the discussion.


No comments yet. Start the discussion.