
Punjabi · Breakfast
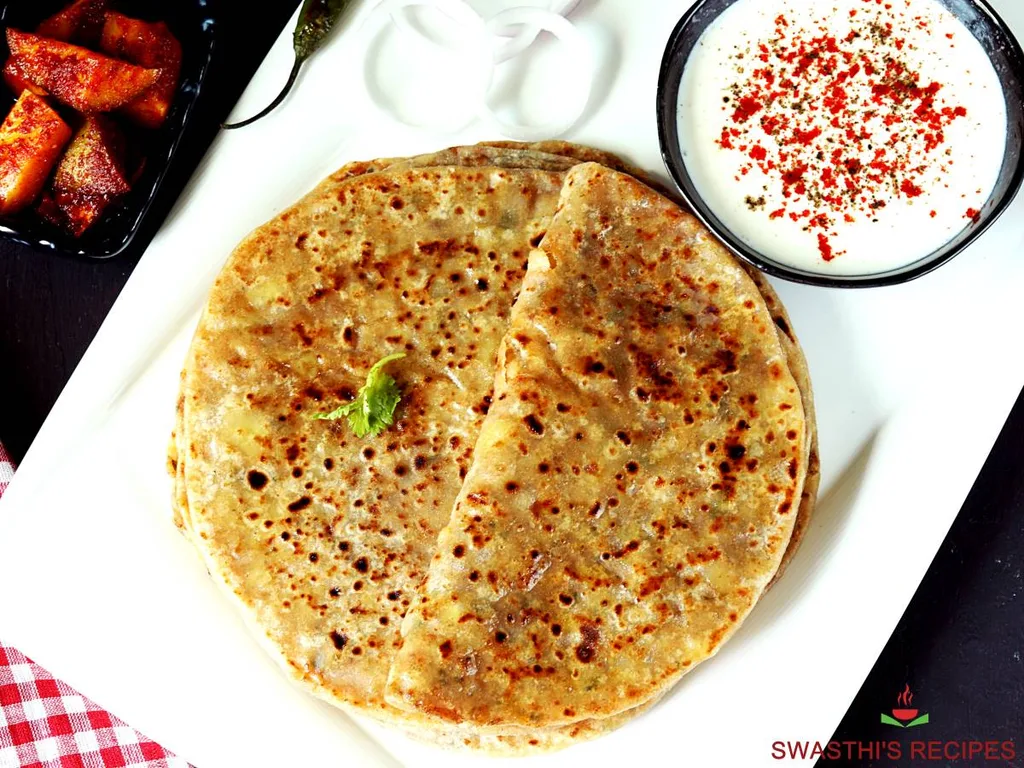
Aloo Paratha Recipe | Potato Stuffed Paratha
From the zcook collection
These stuffed parathas are made with spiced potato filling. Known as aloo paratha, these flatbreads are simply delicious and make a great meal. Serve them topped with butter alongside plain yogurt, mint chutney or pickle.
- Vegetarian
- Indian
- Breakfast
- aloo paratha
- stuffed paratha
- Total
- 45 min
- Prep
- 20 min
- Cook
- 25 min
- Serves
- 8 parathas (6 larger parathas with optional sandwich method)
- Level
- Hard
- Energy
- 189 kcal
Method27 steps · about 45 min
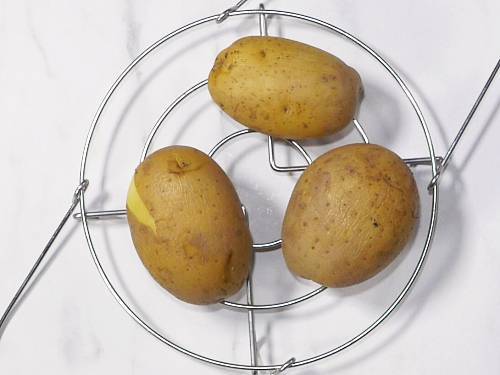
Step 1: Cook the potatoes (350 g) in water just until fork-tender, without making them mushy. Choose ONE method: boil in a pot; pressure-cook for 3–4 whistles in a stovetop cooker, depending on potato size; OR use the author’s Instant Pot route, 5 minutes at pressure for medium potatoes. Release pressure according to the cooker instructions before opening and check tenderness.
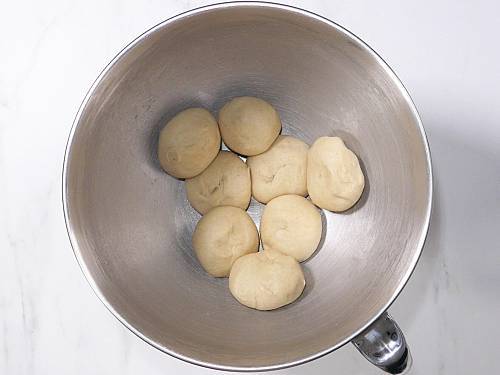
Step 2: While the potatoes cook, mix the 2 cups flour with the ¼ tsp dough salt and optional 1 tbsp dough oil. Begin with ½ cup water, then add a little more as needed for a soft, non-sticky dough; the author used ¾ cup plus 2 tbsp in total.

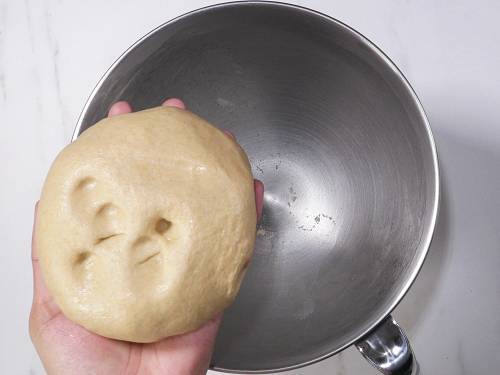
Step 3: Knead it well until soft & pliable. If you press down the dough with your finger, it should dent easily meaning it is soft enough. Cover and rest until the filling is ready.

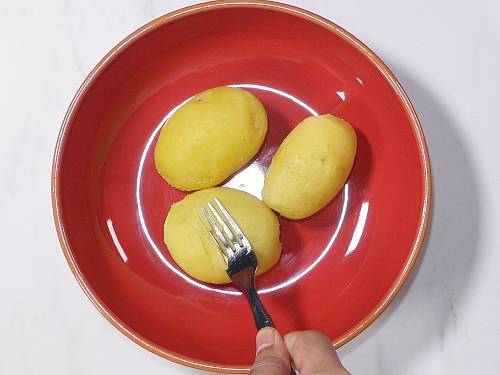
Step 4: When the potatoes are done, cool them slightly and peel while still warm. Ensure your boiled potatoes are not mushy or soggy.

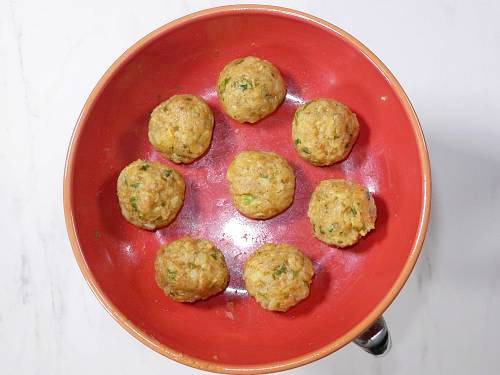
Step 5: Grate or mash them well until no bits of potatoes remain. Using your fingers break any chunks of potatoes left in the mash otherwise they will tear the parathas. Also do not over mash it as the potatoes will turn pasty and sticky.

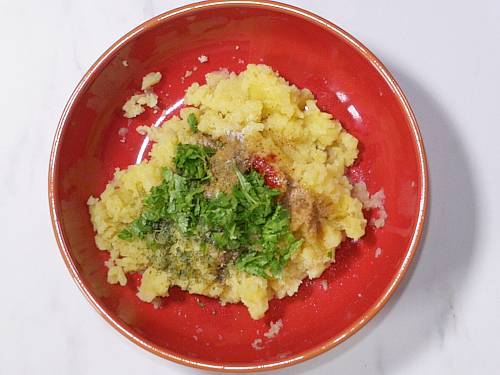
Step 6: Mix the mashed potatoes with ginger (0.75 tsp), optional green chili (1), coriander leaves (2 tbsp), the ½ tsp filling salt, chili powder, garam masala (½–¾ tsp), coriander powder (¾–1 tsp) and crushed dried fenugreek leaves (1 tsp). Add ONE tangy option: ½ tsp chaat masala, 1 tbsp lemon juice, or ½ tsp amchur.

Step 7: Optional: Also add the optional ingredients - ajwain (0.25 tsp) and fennel powder.
Step 8: Gently mix and taste the cooked potato filling. Add a little extra salt or filling spice only if needed.
Step 9: Choose ONE shaping route. For the default eight parathas, divide dough and filling into eight portions each; keep dough covered and continue at step 10. For six larger sandwich-method parathas, skip steps 9–19 and follow step 20 with the whole dough and filling batches.


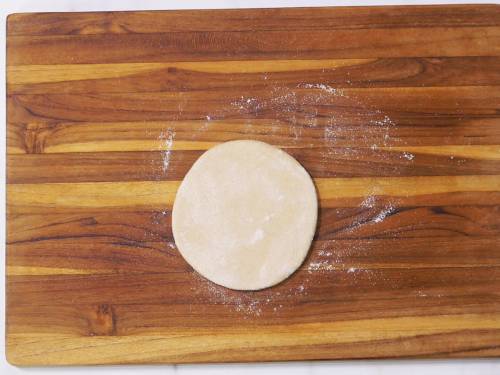
Step 10: Roll a dough ball in your palms to smooth. Lightly sprinkle some flour on the rolling area. Flatten the dough ball and dip it in some flour.
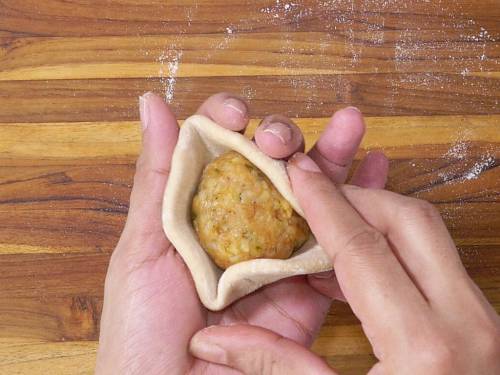
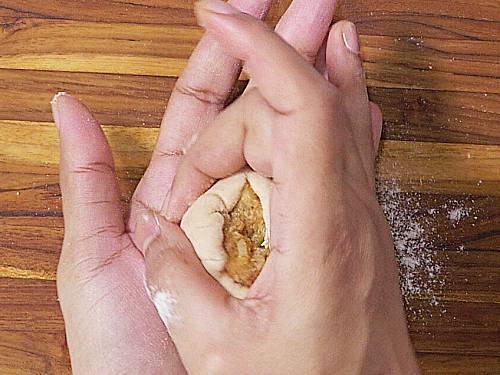
Step 11: For stuffing method 1, roll the floured dough ball into a 4-inch disc. Put one of the eight filling portions in the centre. Raise the dough edges like a cup, gently pushing the filling inward until the edges rise above it. Continue at step 12.
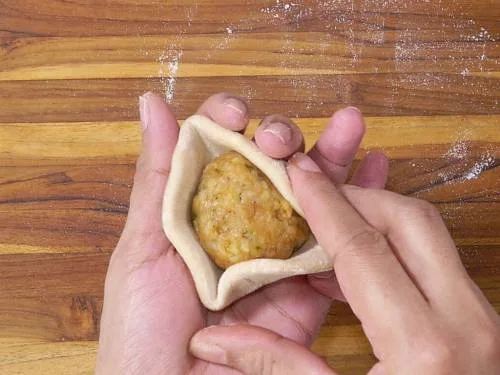


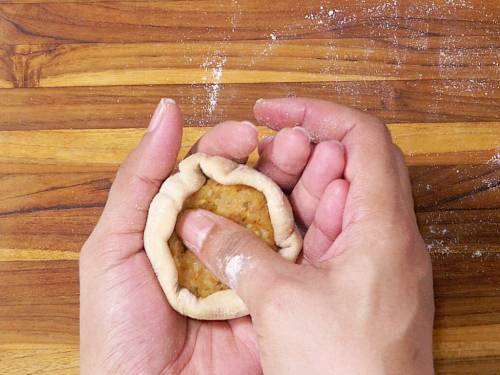
Step 12: For method 1, dip fingers in a little dusting flour if the filling is sticky. Bring the raised edges together and carefully seal over the filling. Continue at step 14.
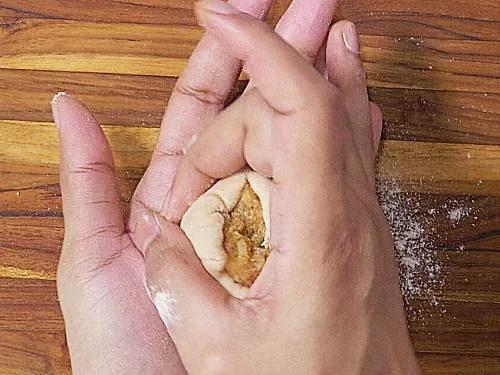
Step 13: For stuffing method 2, INSTEAD of steps 11–12, roll the floured dough ball into a 5-inch disc. Put one filling portion in the centre, pleat the edges and gather them at the top. Seal over the filling and remove excess dough. Continue at step 14.
Step 14: For either method 1 or 2, lightly dust the sealed stuffed ball and gently flatten it to spread the filling evenly. Dust off excess flour.
Step 15: Sprinkle some flour on the rolling area .
Step 16: Place the paratha disc on the rolling area with the sealed side down. Begin to roll evenly all over without putting pressure.
Step 17: Do not roll the aloo paratha continuously. Instead rotate in clock-wise direction a little after every 4 to 6 rolls to ensure it does not tear or get stuck. Sprinkle flour as needed and avoid using excess. If you see the stuffing coming out, gently apply some flour to seal it.
Step 18: Roll the aloo paratha as thin or thick you like without tearing them. I roll mine to 8 to 9 inches.
Step 19: Transfer the rolled parathas to a dry area. Once three are ready, begin cooking at step 21. Skip the alternative sandwich method in step 20.
Step 20: Alternative method 3, INSTEAD of steps 9–19: divide the whole dough into twelve portions and the taste-adjusted filling into six. Roll two dough portions into 6-inch discs. Spread one filling portion over one disc, dampen its edge with a little water, place the second disc on top and press the edges to seal. Lightly dust and roll evenly to your preferred thickness. Repeat for six larger parathas, then continue at step 21.
Step 21: Heat a pan or griddle to cook the aloo parathas. The griddle should be hot enough otherwise the parathas will turn hard,
Step 22: When the pan is hot, gently transfer a rolled aloo paratha to it.
Step 23: With in 2 to 3 mins, you will see bubbles over it. Then flip it to the other side and cook.
Step 24: As the paratha puffs, drizzle a little ghee or frying oil over it and flip to cook that side. Divide the listed 4 tbsp frying fat over all parathas and both sides, adjusting to taste.
Step 25: Smear a little of the remaining batch frying fat on the other side. Press the edges down so they cook thoroughly.
Step 26: Soon you will see golden to light brown spots on the aloo parathas. Remove to a plate and stack them. This keeps them soft.
Step 27: Top the cooked parathas with optional butter. Serve with optional ready-made pickle, plain yogurt, coriander chutney or mint chutney.
Photos (1)
Comments
0 threadsSign in to join the discussion.


No comments yet. Start the discussion.