
Japanese · Appetizer
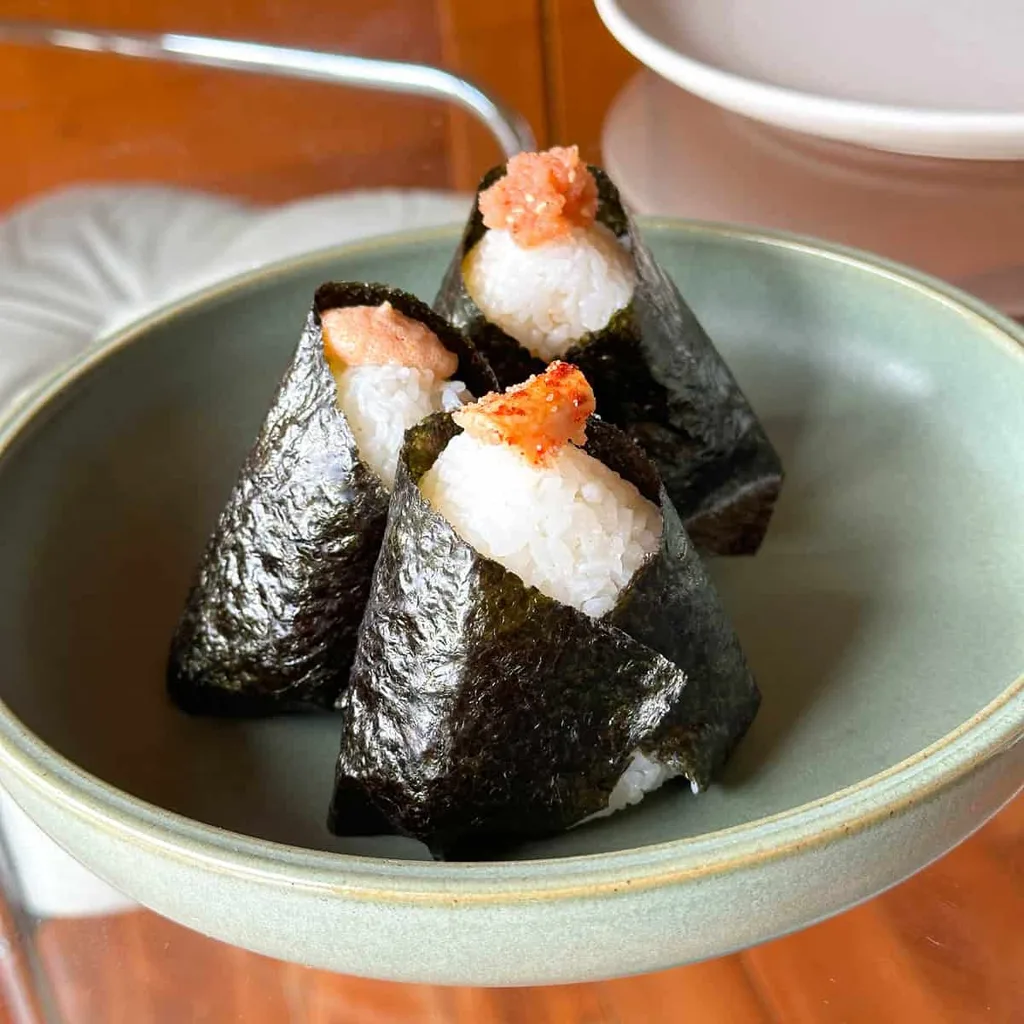
Mentaiko Onigiri / Musubi
From the zcook collection
About six Japanese rice balls from warm cooked short-grain rice and nori, with three one-lobe mentaiko fillings: plain pan-heated roe, roe with mayonnaise, and roe with sesame oil and seeds. Choose one prepared filling per rice ball.
- Spicy
- Japanese
- Onigiri
- Mentaiko
- Three fillings
- Prep
- 20 min
- Serves
- About 6 onigiri pieces
- Level
- Medium
Method15 steps
Step 1: This batch makes all three fillings using one of the three mentaiko lobes for each. Keep the purchased ready-to-eat roe chilled until needed. For the plain heated filling, heat a small dry pan over medium heat and place one whole lobe in it. Heat for 1–2 minutes per side until opaque pale pink and firmer throughout; follow the actual product’s heating directions. Set this one heated lobe aside for the plain filling.
Step 2: For the mayo filling, slit and scrape the membrane from one different ready-to-eat mentaiko lobe, discarding the membrane. Mix all its roe with the 1 tbsp mayonnaise. Keep this one filling cold until assembly.
Step 3: For the sesame filling, remove and discard the membrane from the third ready-to-eat mentaiko lobe (1). Mix all its roe with the 1 tsp sesame oil and 1 tsp sesame seeds. Keep this one filling cold until assembly.
Step 4: Fluff the measured 6 cups freshly cooked, still-warm Japanese short-grain rice (6 cups) and transfer it to one large bowl.
Step 5: Wash the onigiri mold and set it on a clean plate or board. Put an actual amount of sea salt into a small dish and an actual amount of clean water into another dish for lightly wetting the mold. Cut the two full-size nori sheets lengthwise into thirds to make six wrapping strips.
Step 6: Arrange the one warm rice bowl, three prepared filling bowls, clean mold, salt and water dishes, and six nori strips within reach. Keep the two uncooked ready-to-eat roe fillings chilled whenever they are not being used.
Step 7: For the first rice ball, lightly wet the mold using a small actual draw from the prepared water dish, shake out excess, and sprinkle a little actual sea salt from the prepared dish inside.
Step 8: Add an actual draw of the prepared warm rice until the first mold is about 40% full. Pat gently with a rice paddle without crushing the grains.
Step 9: Choose one filling for this first rice ball and place it in the center: use half of the one heated plain lobe, or 1 tsp of the prepared mayo filling, or 1 tsp of the prepared sesame filling. Use only one of these alternatives for this rice ball.
Step 10: Cover the selected first filling with an actual additional draw of warm rice until the mold is full.
Step 11: Put on the mold lid and press gently to seal and shape this first filled rice ball.
Step 12: Invert the first mold and gently press its back to release the first rice ball onto a clean plate.
Step 13: Repeat wetting and lightly salting the mold, bottom rice layer, one selected filling, upper rice layer, pressing and release with the actual remaining rice and fillings. Aim for about six onigiri from the one six-cup batch and six nori strips. Try the three fillings without assigning more than the one heated lobe to plain balls: that lobe makes two half-lobe fillings. Each mayo or sesame ball uses 1 tsp of its actual prepared filling. Keep any unused filling refrigerated and follow the product’s opened-storage directions.
Step 14: Place one of the six prepared nori strips on a clean plate and put the first completed rice ball in its center.
Step 15: Stand the first rice ball upright and fold the nori sides around it, tucking excess underneath. Wrap each remaining ball with one of the remaining strips in the same way, then serve the approximately six pieces warm. Keep chilled ready-to-eat fillings out only as needed for prompt assembly and serving.
Photos (1)
Comments
0 threadsSign in to join the discussion.


No comments yet. Start the discussion.