
Hyderabadi · Dinner
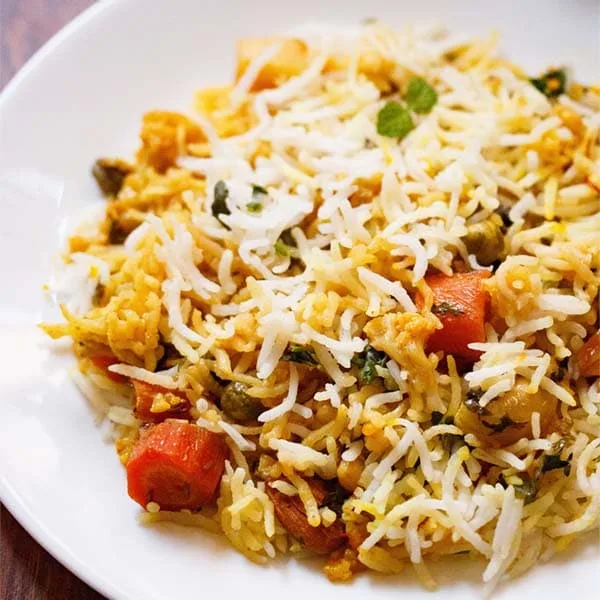
Vegetable Dum Biryani | Hyderabadi Veg Dum Biryani
From the zcook collection
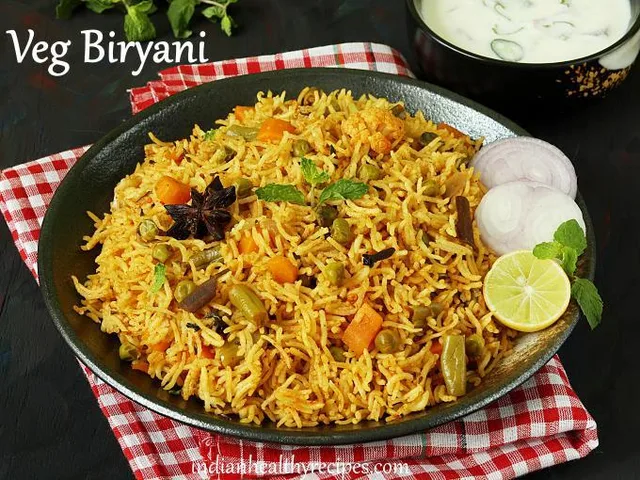
Hyderabadi Veg Dum Biryani is a flavorful dum-cooked rice dish made with basmati rice, spiced vegetable gravy, herbs, nuts, raisins, yogurt and saffron. Each layer is slow-cooked so the rice absorbs the aroma of the masala gravy. The result is a rich, fragrant biryani with balanced flavors and soft, tender vegetables. Serve it hot with raita for a complete and satisfying meal.
- Vegetarian
- Indian
- Dinner
- Hyderabadi
- Main Course
- hyderabadi biryani
- veg dum biryani
- Prep
- 45 min
- Serves
- 5
- Level
- Hard
- Energy
- 437 kcal
Method44 steps
Step 1: Pick and rinse basmati rice (300 g) in running water till the water runs clear of starch. Soak the rice in 1 cup of water for 30 minutes.
Step 2: After 30 minutes drain the rice and set aside.
Step 3: While rice soaks, rinse, peel and chop the chosen vegetables. Thinly slice the onion (115 g); prepare the measured finely chopped ginger (1½ tbsp)/garlic (1 tbsp) and two slit green chillies. Chop the coriander and mint for layering and keep those herbs separate.
Step 4: Take a deep bottomed pan. Add water (5 cups) and heat the water on a high flame.
Step 5: Add the rice-section 1 tsp salt, 3 green cardamoms, 1 black cardamom, 3 whole cloves, 1-inch cinnamon (1-inch) piece, one tej patta and two mace strands to the hot rice-boiling water.
Step 6: Bring the water to a boil. Then add the soaked basmati rice.
Step 7: Gently stir the rice. The boiling water should taste slightly salty; add separate extra rice-water salt only if needed.
Step 8: Do not reduce the flame and continue to cook the rice grains.
Step 9: Stop boiling when the rice is about ¾ cooked: grains should retain a slight bite and must not yet be fully tender.
Step 10: Drain the par-cooked rice in a colander, gently fluff and reserve. Discard its boiling water; it is not gravy liquid.
Step 11: For the source’s ordinary-pan vegetable-gravy route, heat 3 tbsp ghee OR oil in a pan. Add the gravy-section shahi jeera (1 teaspoon), tej patta (1), 3 green cardamoms, 1 black cardamom, 1-inch cinnamon (1-inch) and separate 3 whole cloves; sauté until fragrant and crackling.
Step 12: Now add the onions. Stir and sauté them on a low to medium flame.
Step 13: Add a pinch of salt to quicken the cooking process.
Step 14: When the onions are cooking, take 1 cup fresh curd (yogurt (1 cup)) in a bowl and whisk the curd with a spoon or wired whisk till it become smooth.
Step 15: Sauté the onions till they become golden brown or caramelize.
Step 16: Add the prepared 1½ tbsp finely chopped ginger, 1 tbsp finely chopped garlic and two slit or sliced green chillies. This follows the source’s chopped-aromatic option, without adding a second paste supply.
Step 17: Sauté till the raw aroma of ginger-garlic goes away.
Step 18: Add the turmeric and red chili powder. Stir and mix well.
Step 19: Add the prepared chopped vegetables and green peas, including mushrooms and bell pepper only if chosen. Mix and sauté for 1–2 minutes.
Step 20: Lower the heat, stir in the prepared whisked yogurt promptly, then add the separate ¾ cup water for this ordinary-pan cooking route.
Step 21: Season with salt and mix again.
Step 22: Cook the vegetable gravy gently in the ordinary pan until the vegetables are tender without becoming mushy, stirring as needed.
Step 23: Warm 4 to 5 tablespoons milk in a microwave or in a small pan on the stove top. Add ¼ teaspoon of saffron strands. Stir and keep aside.
Step 24: Check the cooked vegetables and gravy in the ordinary pan.
Step 25: If any vegetables are still underdone, continue simmering until tender.
Step 26: If excess liquid remains, simmer uncovered until the gravy is medium to slightly thick, with no watery stock-like consistency.
Step 27: Now add cashews (2 tablespoons), raisins (1 tablespoons) and almonds (2 tablespoons) (blanched or raw) to the vegetable gravy. Mix and stir. Set aside. Do a taste test and check the salt in the vegetable gravy. Add more if needed.
Step 28: Now in a thick bottomed pan, layer half portion of the vegetable gravy first.
Step 29: Then layer half portion of the semi-cooked rice.
Step 30: Sprinkle half of the chopped coriander leaves (cilantro), mint leaves and saffron milk.
Step 31: Layer the remaining vegetable gravy.
Step 32: Layer the remaining half of the par-cooked rice over the second gravy layer. Sprinkle the remaining half each of prepared coriander, mint and saffron milk, then optional 2 tsp kewra OR rose water and optional ⅓–½ cup ready fried onions.
Step 33: Keep the vegetable gravy at the bottom of the assembled layers and the rice at the top.
Step 34: Seal the top of the pot with aluminium foil and cover tightly with its lid. This follows the source’s foil-and-lid sealing route.
Step 35: Heat a tawa or heavy griddle over medium heat; you may begin while layering the biryani.
Step 36: When the tawa is hot, turn the heat to its lowest setting and place the sealed biryani pot on the tawa.
Step 37: Cook on the tawa over the lowest heat for 30–35 minutes. This follows the full tawa dum route from the source.
Step 38: Carefully open and check the rice and bottom layer: the rice should now be tender and there should be no pooled liquid at the bottom. If needed, reseal and continue gentle dum cooking until those endpoints are reached.
Step 39: Turn off the heat and let the completed biryani rest for 5–7 minutes before serving.
Step 40: While serving, make sure you equally serve the vegetables as well as the rice.
Step 41: Serve the finished biryani with optional ready savory raita of choice.
Step 42: Other optional ready accompaniments are onion-tomato salad, separate fresh plain yogurt, mango pickle, lemon wedges or roasted papad.
Step 43: You may also serve the finished biryani with optional ready mirchi ka salan OR shorba.
Step 44: The completed biryani may also be served on its own without accompaniments.
Good to know
Storage
Step 1: Store the biryani leftovers in your refrigerator for a day only. While reheating steam for 5 minutes in a pan or Instant pot. You could even lightly sauté the biryani stirring frequently in a frying pan or skillet until warm or hot.
Photos (1)
Comments
0 threadsSign in to join the discussion.

No comments yet. Start the discussion.