
Singaporean · Snack
Kueh Lapis (Nine-Layer Cake / Jiu Ceng Gao)
From the zcook collection
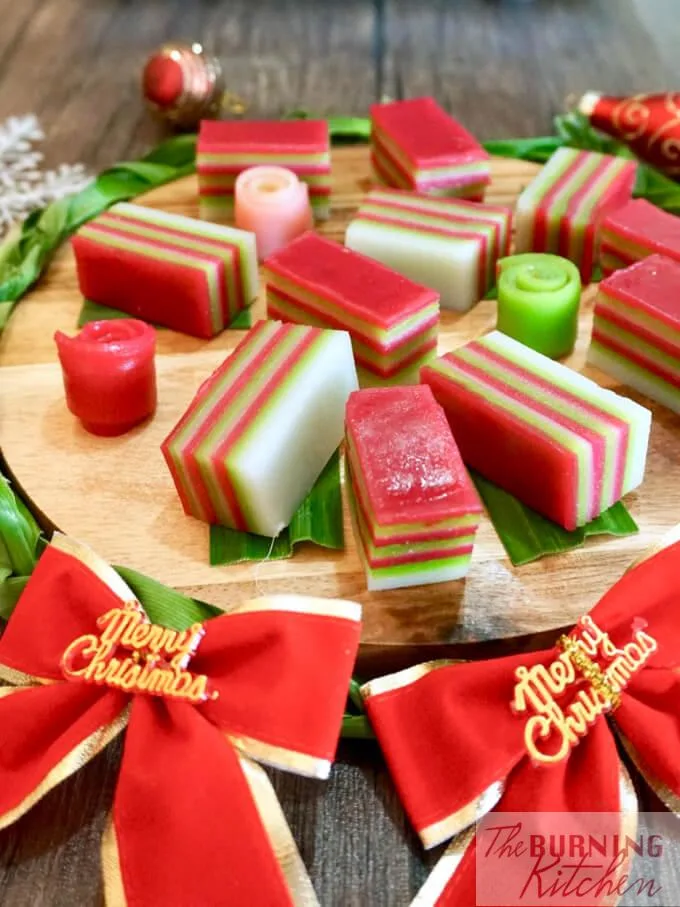
Soft pandan-coconut kueh with nine alternating white, green and red steamed layers. This version uses the Panasonic Cubie Steam-High route and is cooled completely before cutting into 24 pieces.
- Vegan
- Dairy-free
- Singaporean
- Malaysian
- Snack
- Kueh Lapis
- Steamed Cake
- Prep
- 15 min
- Serves
- 24 pieces
- Level
- Medium
Method21 steps
Step 1: Wash and drain the 8–10 syrup pandan leaves and the separate 4–6 garnish leaves. Twist the syrup leaves to release their fragrance, then tie them into a bundle. Keep the clean garnish leaves separate for serving.
Step 2: Put the 600 ml syrup water, 400 g sugar, ½ tsp salt and prepared syrup pandan bundle from step 1 into a pot. Bring to a boil, then simmer for 5 minutes until the sugar dissolves and the syrup is fragrant.
Step 3: Strain the syrup from step 2 into a large heatproof bowl and remove the pandan leaves. Stir in the 600 ml chilled coconut cream to help cool the syrup, then allow the mixture to cool before adding flour.
Step 4: In a separate bowl, mix the 250 g tapioca flour and 200 g regular rice flour thoroughly.
Step 5: When the coconut-syrup mixture from step 3 has cooled, whisk in the mixed flours from step 4 a little at a time until smooth.
Step 6: Sieve the batter from step 5 to remove lumps, then divide it equally among three bowls. Tint one bowl red and one green with food-grade colouring; leave the third white. Stir each bowl before every later pour. Use only enough batter to cover each preceding layer, keeping any unused batter separate.
Step 7: Use the 1 tsp pan-greasing oil to coat the bottom and sides of a 7-inch non-stick square tin. Set it level so the layers have an even thickness.
Step 8: For the selected Panasonic Cubie steam-oven route, fill the water tank according to the appliance instructions. Put the greased tin from step 7 on the lower rack and preheat on Steam-High for about 3 minutes, until steam is established. Check and refill the tank as needed throughout the later layers, following the appliance instructions.
Step 9: Layer 1, white: stir the white batter from step 6, then ladle just enough into the hot greased tin from step 8 to cover its bottom. Steam on Steam-High for about 4 minutes and check that the layer is completely set before continuing.
Step 10: Layer 2, green: once the white layer from step 9 is set, stir the green batter from step 6 and add just enough to cover it. Steam on Steam-High for about 3 minutes, then check that the green layer has completely set.
Step 11: Layer 3, red: once the green layer from step 10 is set, stir the red batter from step 6 and add just enough to cover it. Steam on Steam-High for about 3 minutes, then check that the red layer has completely set.
Step 12: Layer 4, white: once the red layer from step 11 is set, stir the white batter from step 6 and add just enough to cover it. Steam on Steam-High for about 3 minutes, then check that the white layer has completely set.
Step 13: Layer 5, green: once the white layer from step 12 is set, stir the green batter from step 6 and add just enough to cover it. Steam on Steam-High for about 3 minutes, then check that the green layer has completely set.
Step 14: Layer 6, red: once the green layer from step 13 is set, stir the red batter from step 6 and add just enough to cover it. Steam on Steam-High for about 3 minutes, then check that the red layer has completely set.
Step 15: Layer 7, white: once the red layer from step 14 is set, stir the white batter from step 6 and add just enough to cover it. Steam on Steam-High for about 3 minutes, then check that the white layer has completely set. If condensation has collected above the tin, wipe it carefully with a clean cloth while the appliance is safely open.
Step 16: Layer 8, green: once the white layer from step 15 is set, stir the green batter from step 6 and add just enough to cover it. Steam on Steam-High for about 3 minutes, then check that the green layer has completely set. Check the tank and handle condensation safely before the final layer.
Step 17: Layer 9, red: once the green layer from step 16 is completely set, stir the red batter from step 6 and add just enough to cover it. Steam on Steam-High for about 10–12 minutes, checking from 10 minutes, until the top and whole cake are fully set. Discard any unused batter once the nine layers are finished.
Step 18: Remove the set cake tin from step 17 from the oven. Cool the tin in an ice-water bath, keeping the bath water below the rim and out of the cake, then refrigerate promptly to finish cooling. Leave it until completely cool and firm enough to release cleanly before proceeding; do not wait for hours at room temperature. The author gives a 4–6-hour cooling guide, but the fully cooled texture determines when to unmould.
Step 19: Grease a silicone spatula lightly with some tool-greasing oil. Run it around the completely cooled cake from step 18, then invert the tin onto a piece of baking paper to release the cake.
Step 20: Turn the released cake from step 19 so the red layer faces up. Lightly grease a sharp knife with some tool-greasing oil, then cut the cake into 24 pieces in a 6 × 4 grid.
Step 21: Arrange the 24 cake pieces from step 20 and decorate with some clean cut garnish pandan from step 1. Refrigerate leftovers promptly in an airtight container, separating pieces so they do not stick. Use within 2–3 days. For reheating, remove any plastic wrapping and steam until heated through; the author gives about 5–7 minutes as a guide, then let the pieces cool enough to eat.
Photos (1)
Comments
0 threadsSign in to join the discussion.




No comments yet. Start the discussion.