
Japanese · Dinner
Okonomiyaki
From the zcook collection
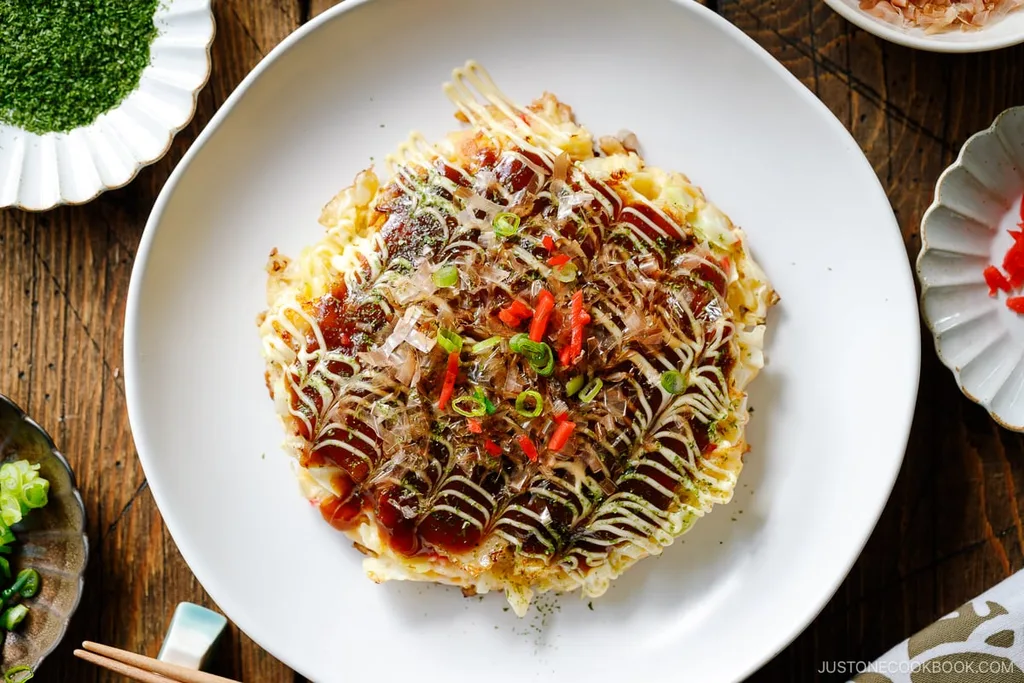
Learn how to make Okonomiyaki, Osaka’s savory cabbage pancake! This fun, customizable Japanese street food is perfect for dinner and parties.
- Japanese
- Dinner
- Just One Cookbook
- Prep
- 30 min
- Cook
- 40 min
- Serves
- 4 servings
- Level
- Hard
- Energy
- 510 kcal
Method22 steps
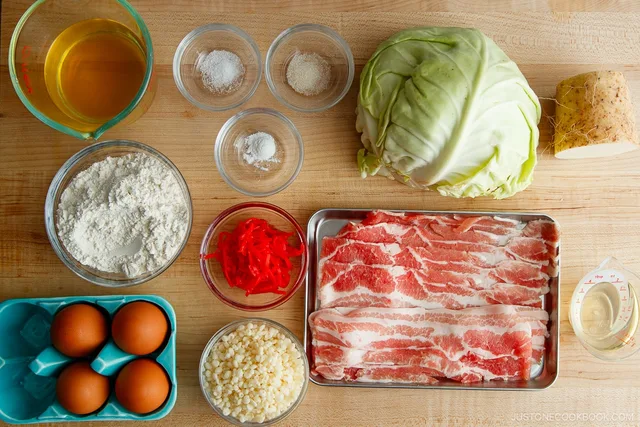
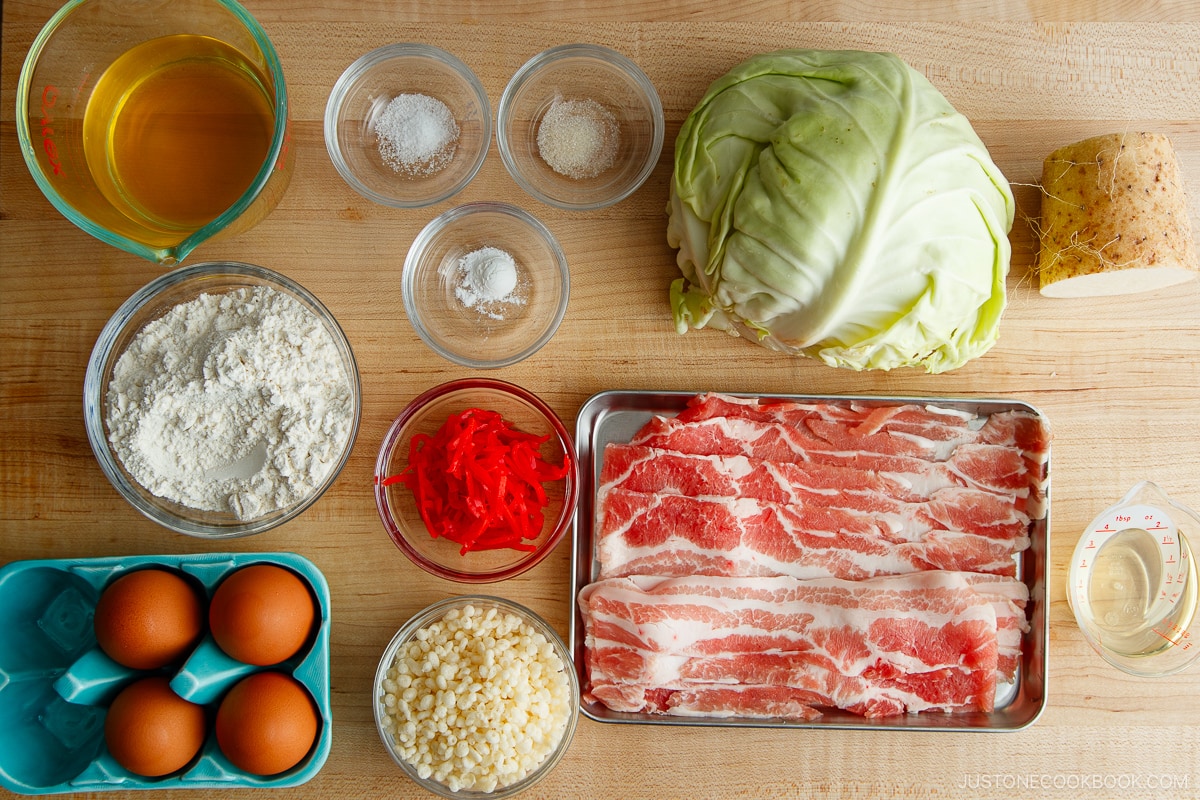
Step 1: Before You Start: If time allows, let the batter rest for at least one hour (and up to overnight) for a fluffier okonomiyaki. Now, gather all the ingredients.
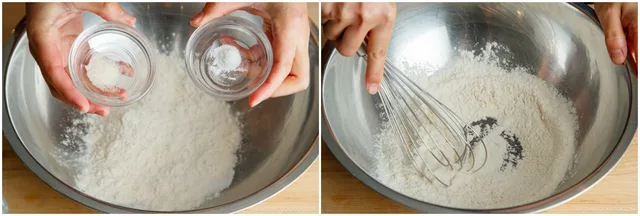
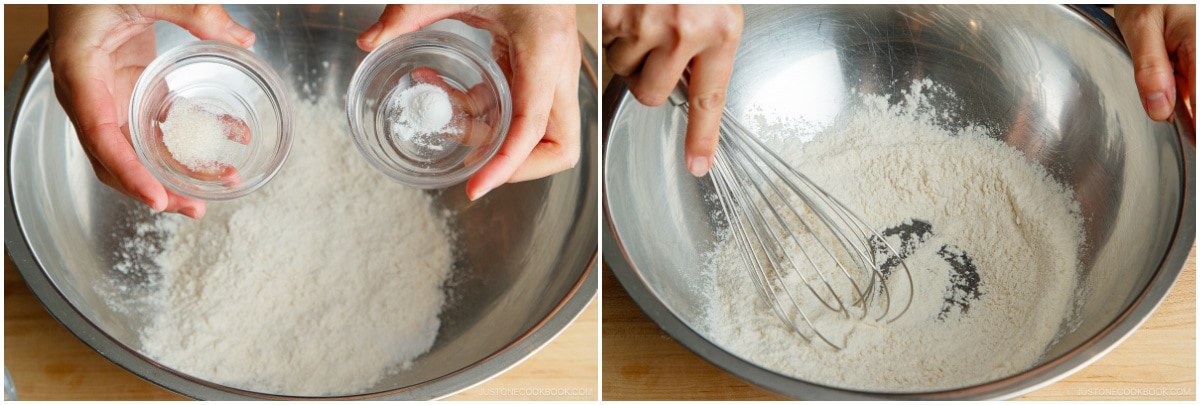
Step 2: In a large bowl, combine 1 cup all-purpose flour (plain flour), ¼ tsp Diamond Crystal kosher salt, ¼ tsp sugar, and ¼ tsp baking powder. Mix all together.
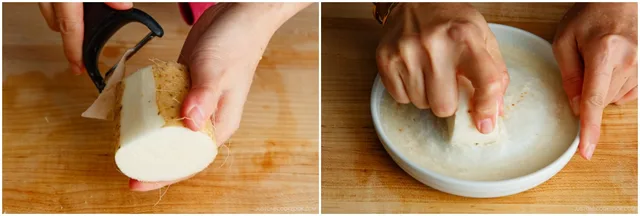
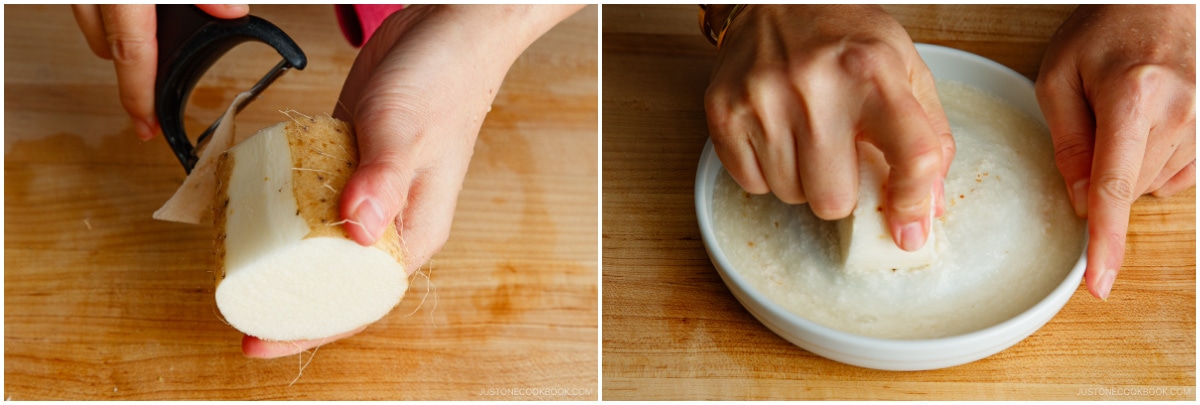
Step 3: Peel and grate 5.6 oz nagaimo/yamaimo (mountain yam) in a small bowl (I use a ceramic grater that I love). Note: The nagaimo may irritate your skin and cause itchiness. Work quickly and rinse your hands immediately after touching the nagaimo. It is very slimy and slippery, so make sure you have a good grip on the nagaimo if you wear kitchen gloves.
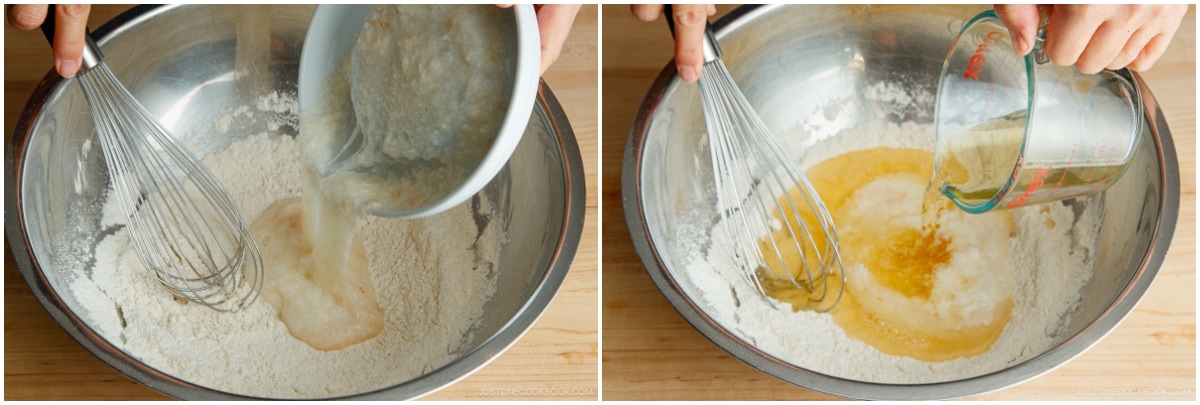
Step 4: Add the grated nagaimo and ¾ cup dashi (Japanese soup stock) to the bowl.
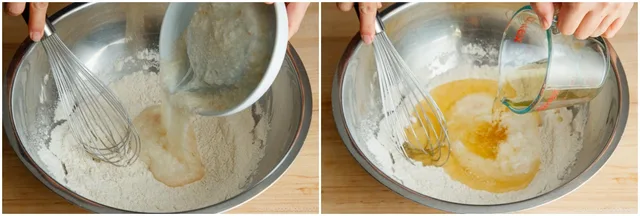
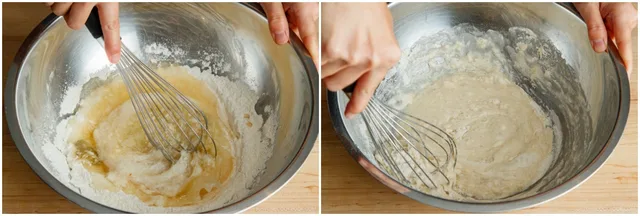
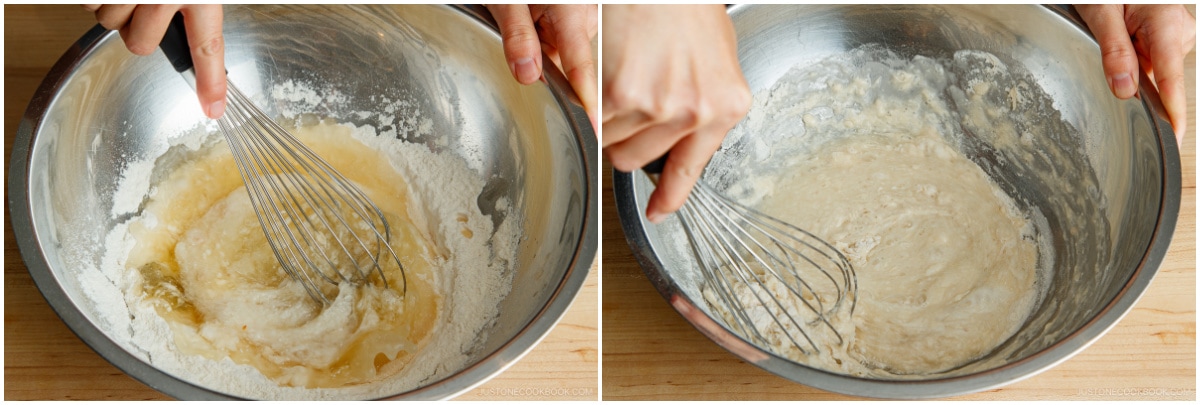
Step 5: Mix it all together until combined and set aside while you prepare the ingredients. If time allows, cover the bowl with plastic wrap, put it in the refrigerator, and let the batter rest for at least one hour (and up to overnight). Tip: Resting the batter relaxes the gluten, improves the flavor, and makes the okonomiyaki fluffier. Some okonomiyaki shops refrigerate the batter overnight.
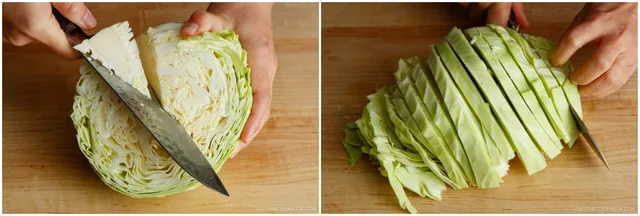
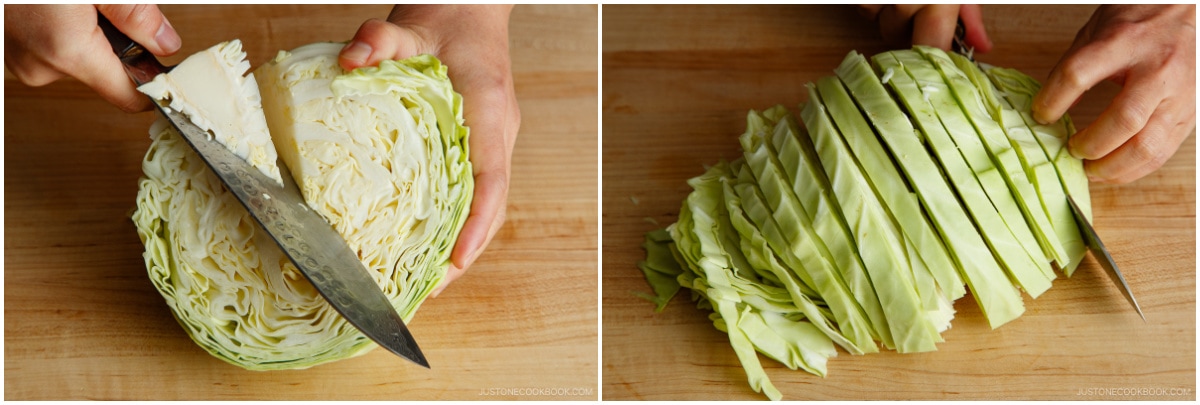
Step 6: Discard the core of ½ head green cabbage and cut into ½-inch (1.3-cm) slices.
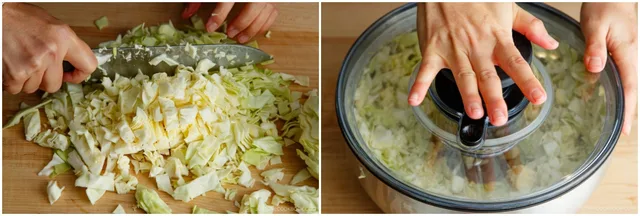
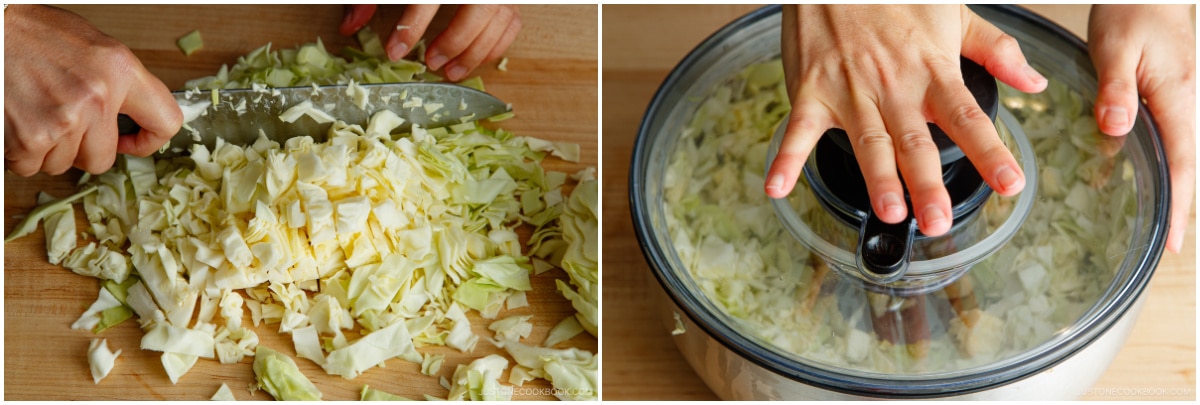
Step 7: Then, mince the cabbage strips. Wash the cabbage and drain well (I use a salad spinner) to remove excess moisture that could potentially dilute the batter.
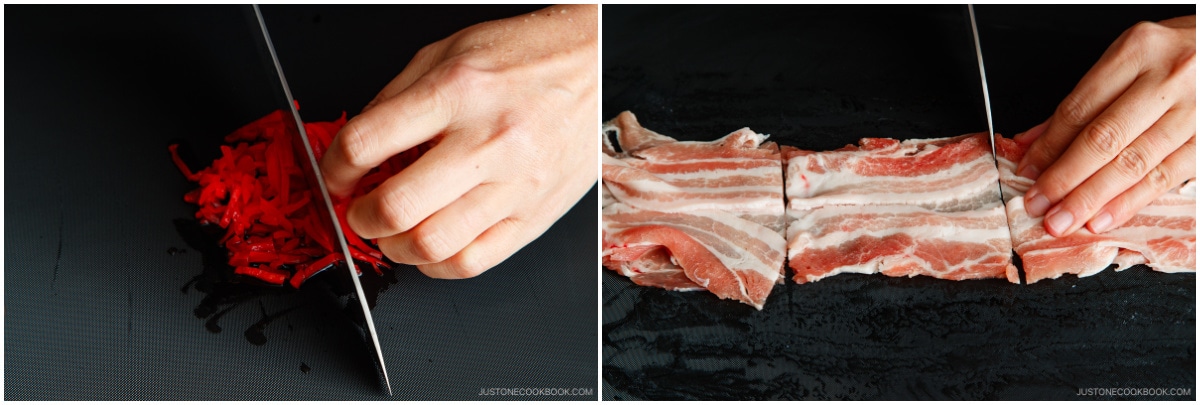
Step 8: Chop ¼ cup pickled red ginger. Cut ½ lb sliced pork belly into 4-inch (10-cm) pieces and set aside.
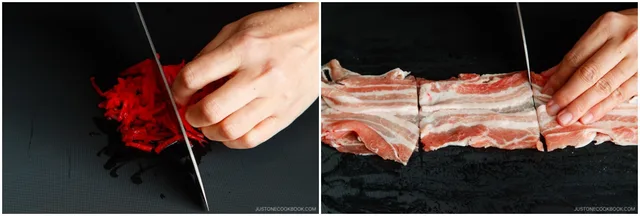
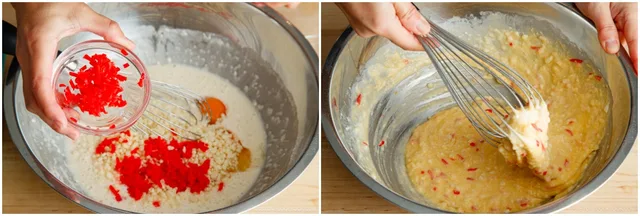
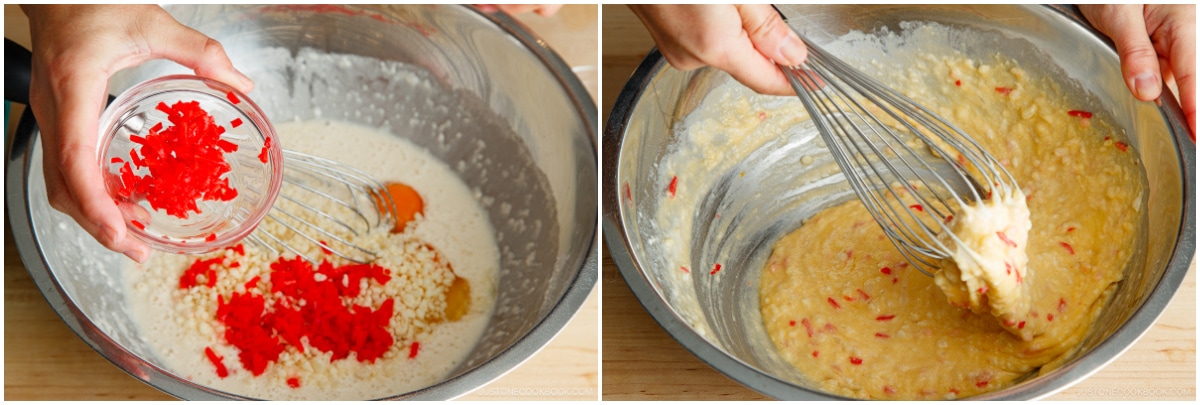
Step 9: If you rested the base batter for an hour or longer, take it out from the refrigerator. Add 4 large eggs (50 g each w/o shell), ½ cup tenkasu/agedama (tempura scraps), and two-thirds of the pickled red ginger to the bowl. Mix until combined.
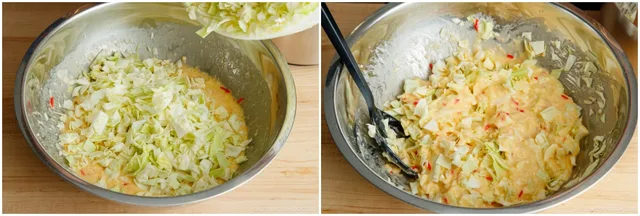
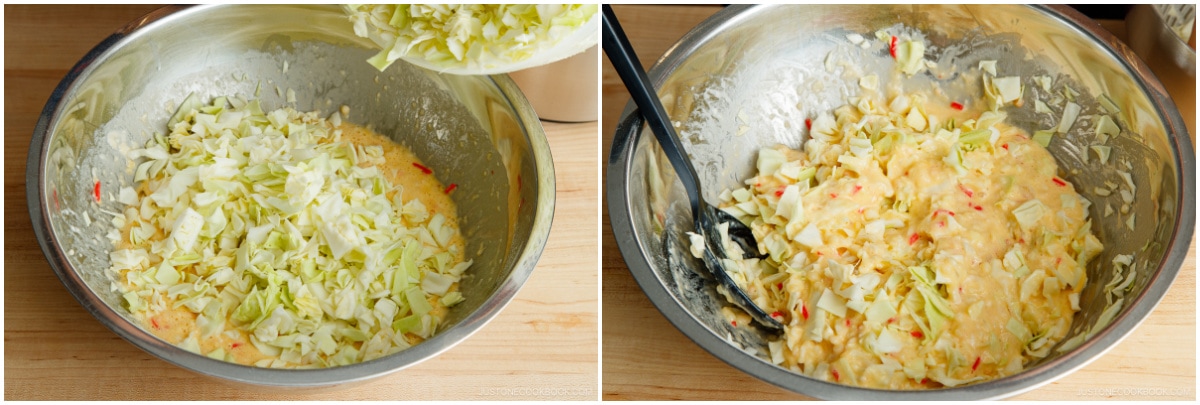
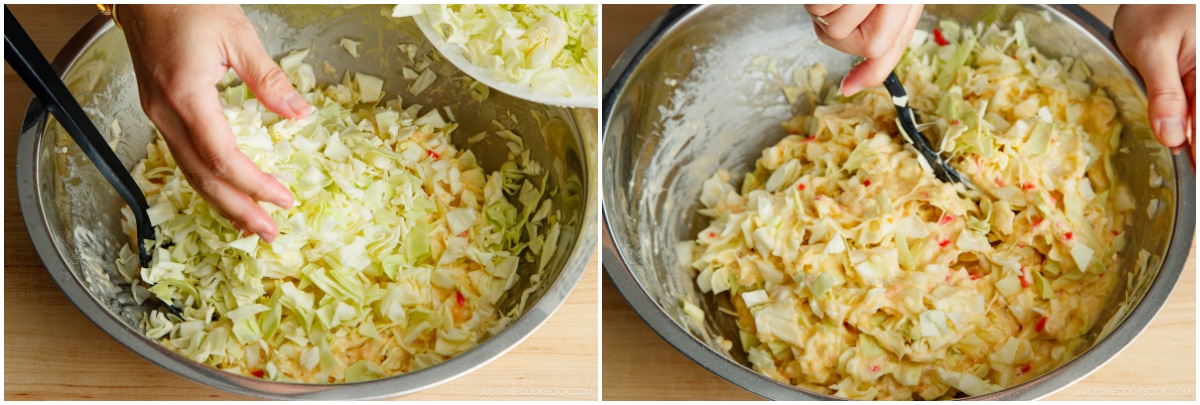
Step 10: Add the minced cabbage to the batter, one-third of it at a time. Mix well before each addition.
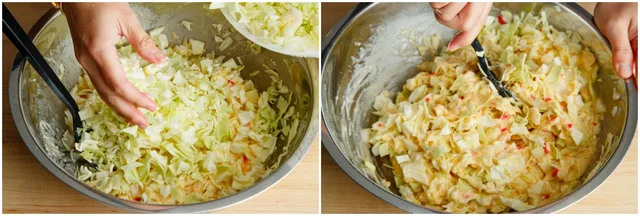
Step 11: Check the consistency of the okonomiyaki batter. Make sure the cabbage is coated well in the batter. You do not need to use all the minced cabbage if it is overpowering the batter.
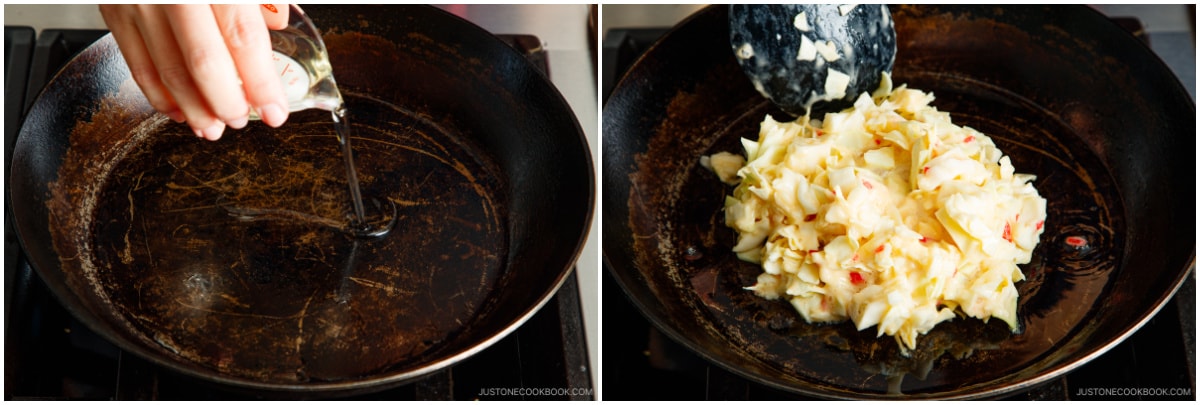
Step 12: Prepare a large griddle or two large frying pans with lids to cook two savory pancakes at a time. In the pans, heat a bit of neutral oil on medium heat. When it‘s hot (400ºF or 200ºC), add one portion of the batter to each pan.
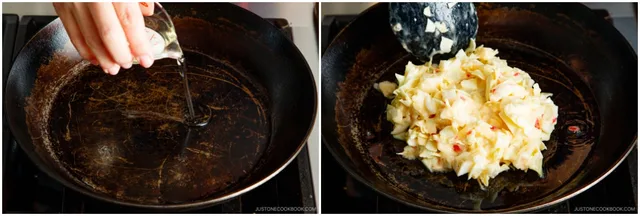
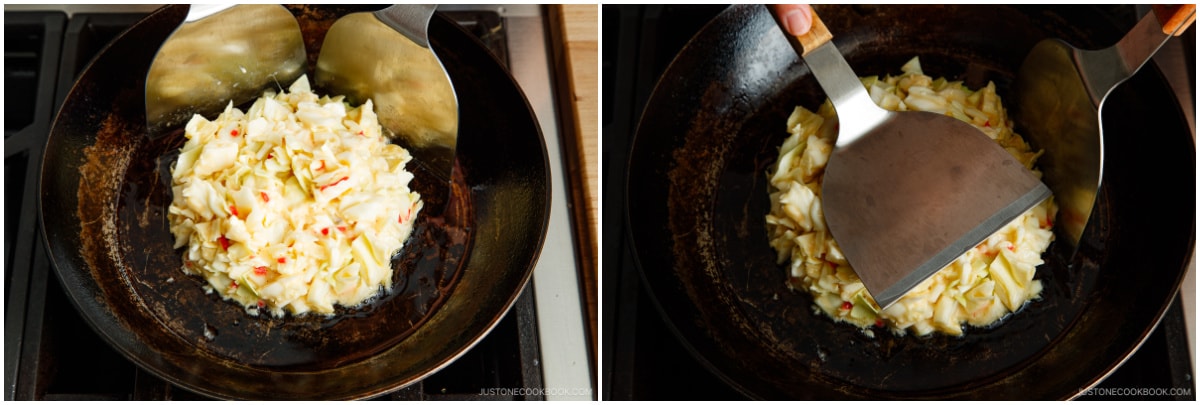
Step 13: Using spatulas, spread and shape the batter in a circle about 6 inches (15 cm) in diameter. We like thicker okonomiyaki (the final thickness is ¾ inches or 2 cm). If you’re new to making okonomiyaki, make it smaller and thinner so it’s easier to flip.
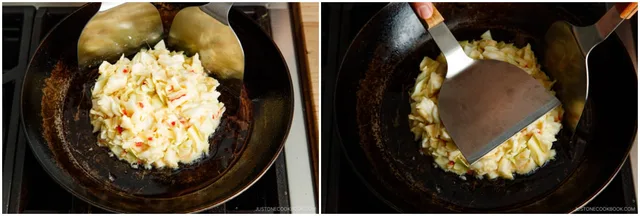
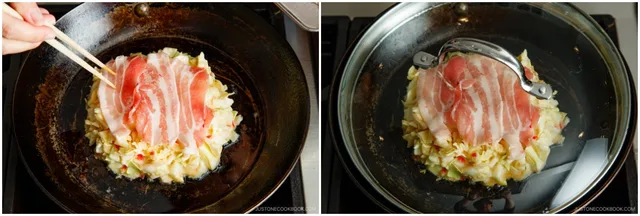
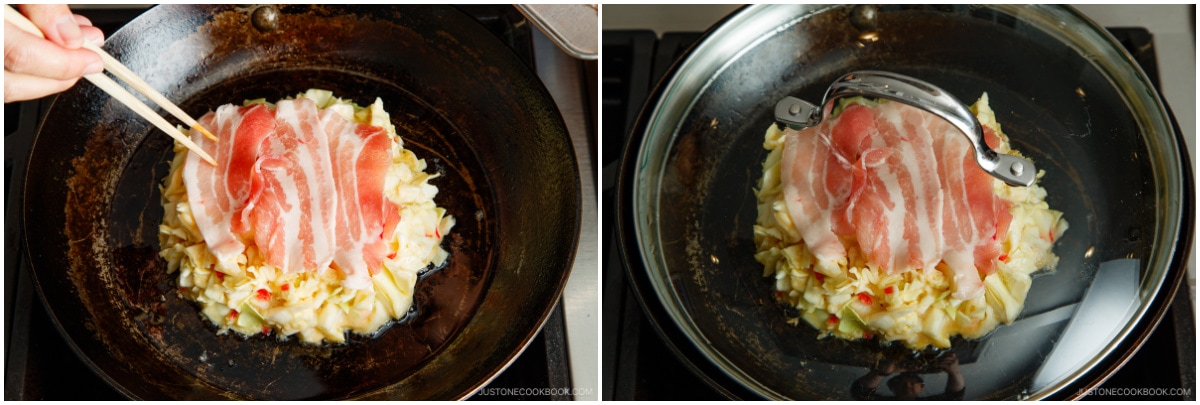
Step 14: Divide the cut pork belly pieces among the pancakes, arranging about 3 pieces on top of each as they fit. Cook, covered, over medium-low heat for 5 minutes.
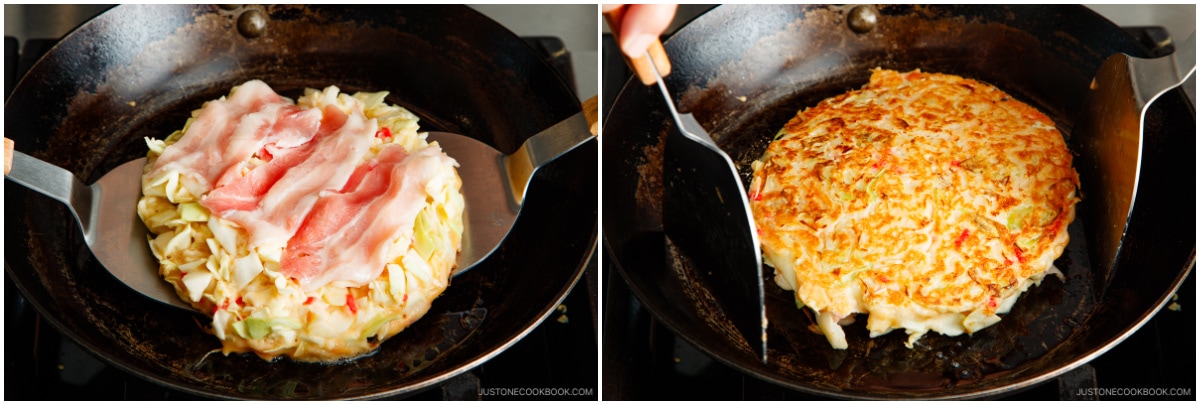
Step 15: When the bottom side is nicely browned, flip them over.
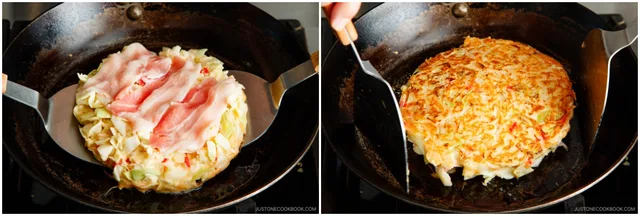
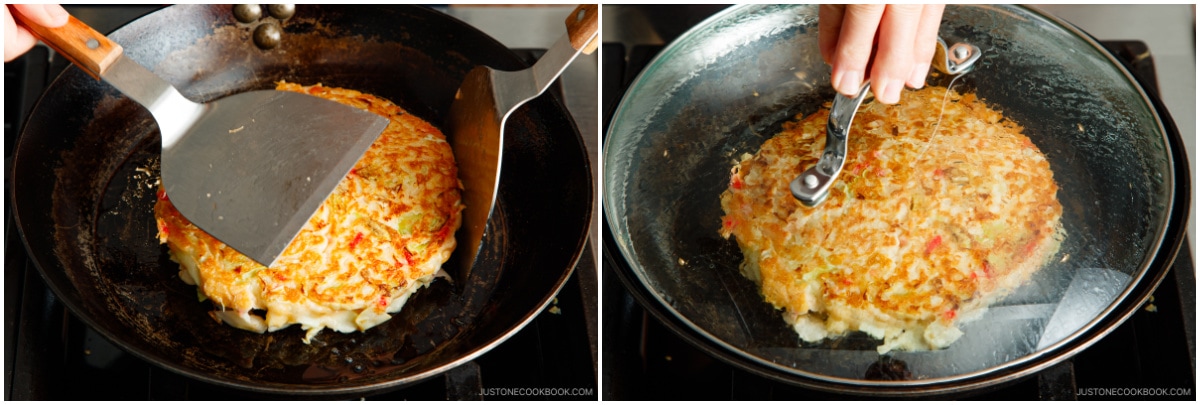
Step 16: Gently press the okonomiyaki to fix their shape and keep them together. Cook, covered, for another 5 minutes.
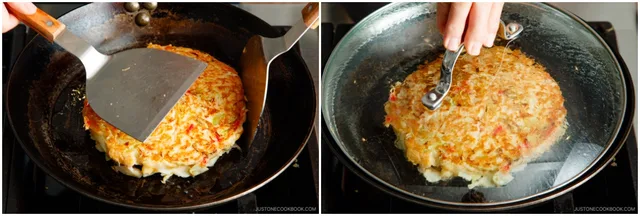
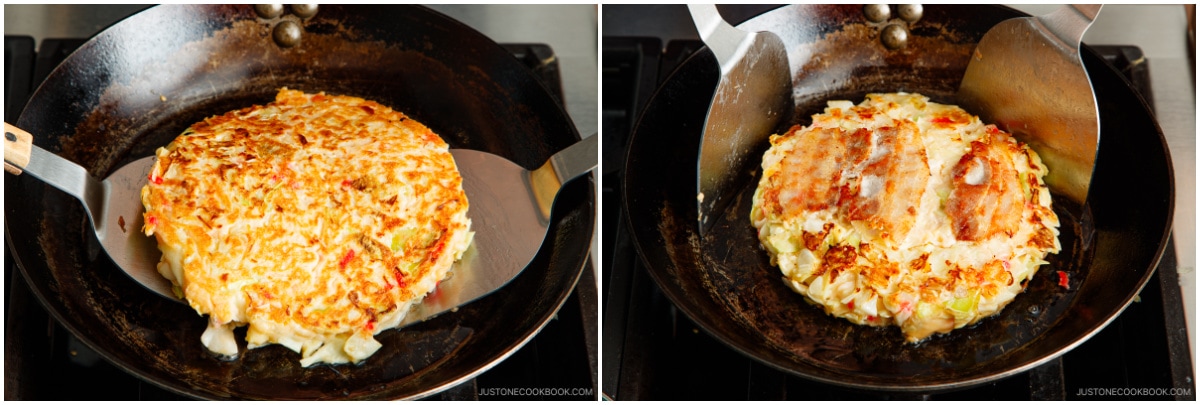
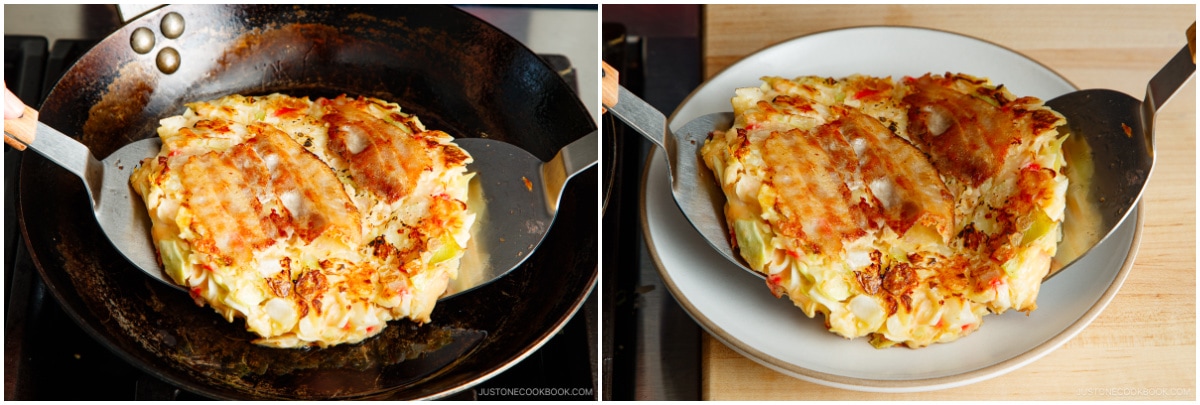
Step 17: Flip the pancakes over one last time and fix their shape. Cook, uncovered, for about 2 minutes, until browned and the batter and pork are cooked through; continue cooking as needed.
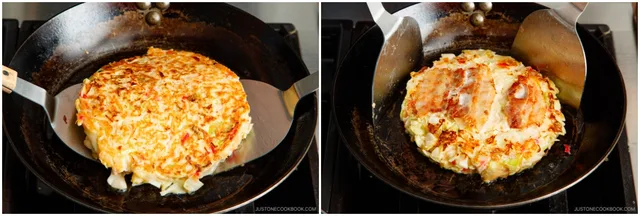
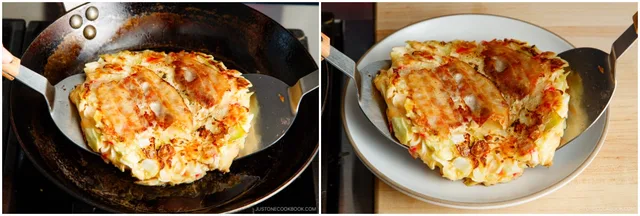
Step 18: Transfer the cooked okonomiyaki to individual plates. Continue cooking the rest of the okonomiyaki.
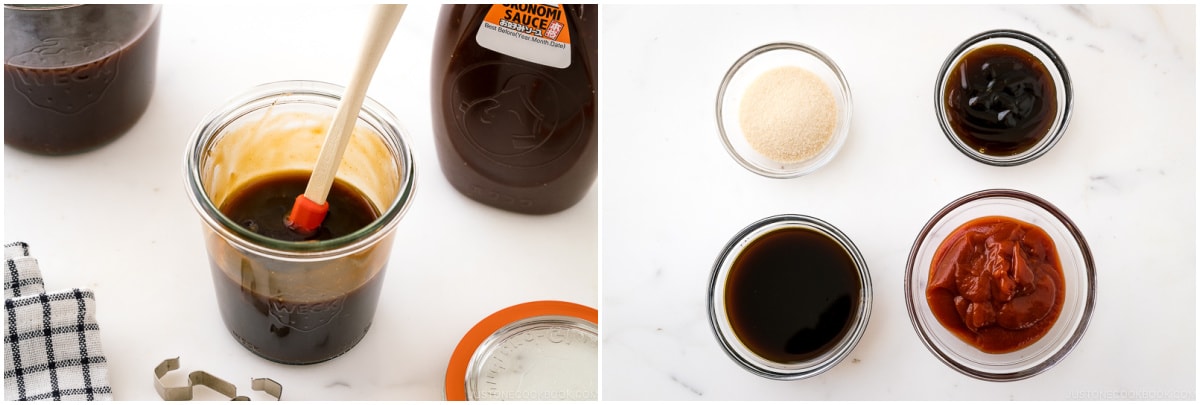
Step 19: Optional homemade sauce: if using this instead of bottled okonomiyaki sauce, combine 3 Tbsp sugar, 4 Tbsp oyster sauce, 8 Tbsp ketchup, and 7 Tbsp Worcestershire sauce in a small bowl. Mix until the sugar dissolves. Use as much as desired and reserve any unused sauce.
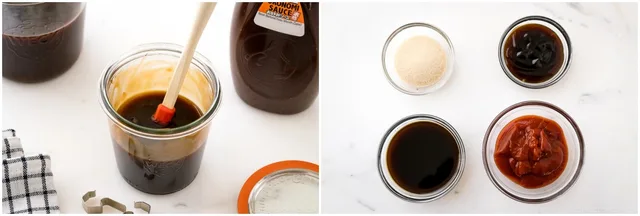
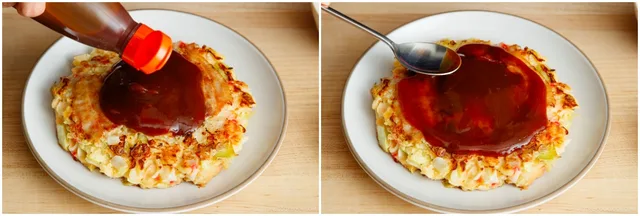
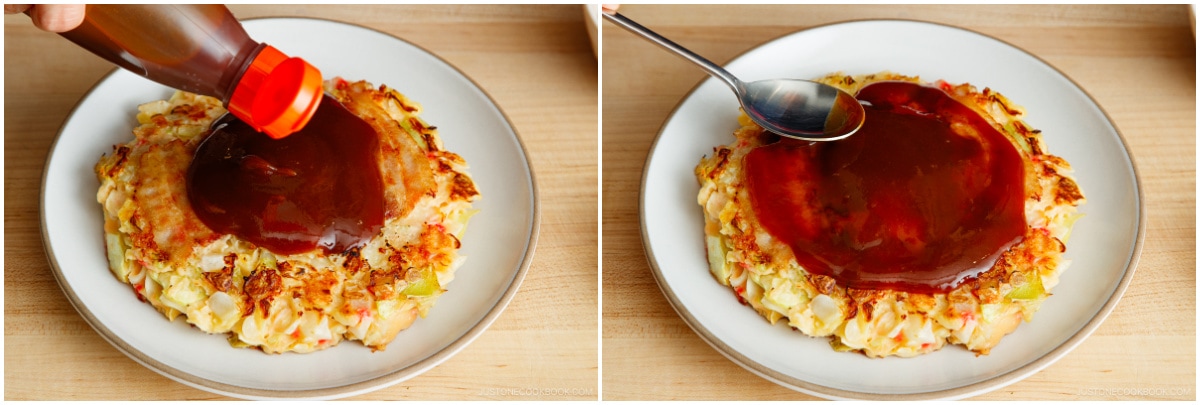
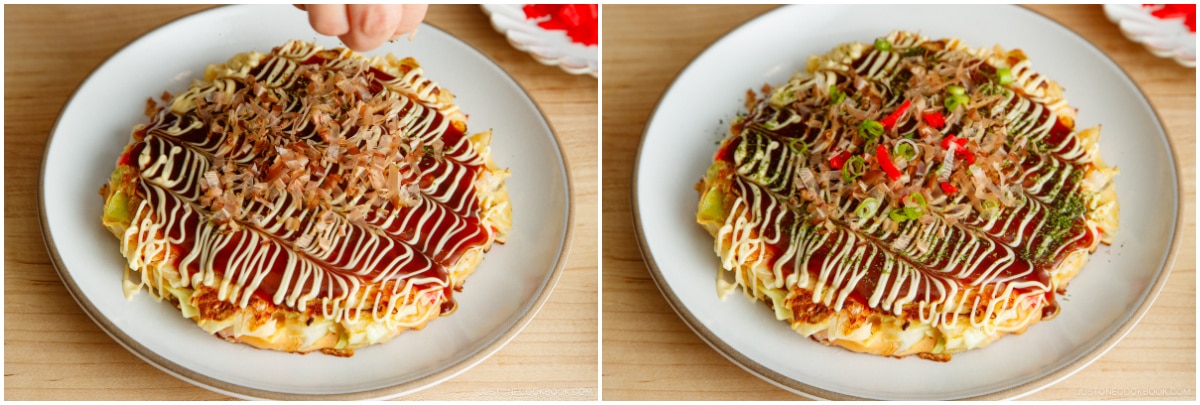
Step 20: Spread either prepared bottled okonomiyaki sauce or the homemade sauce from step 19 over each cooked pancake, using as much as desired.
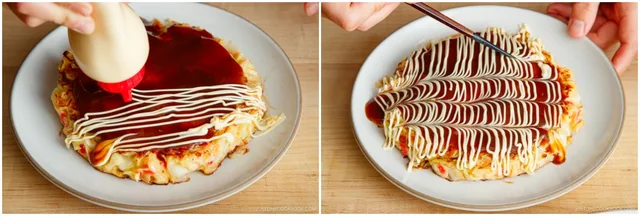
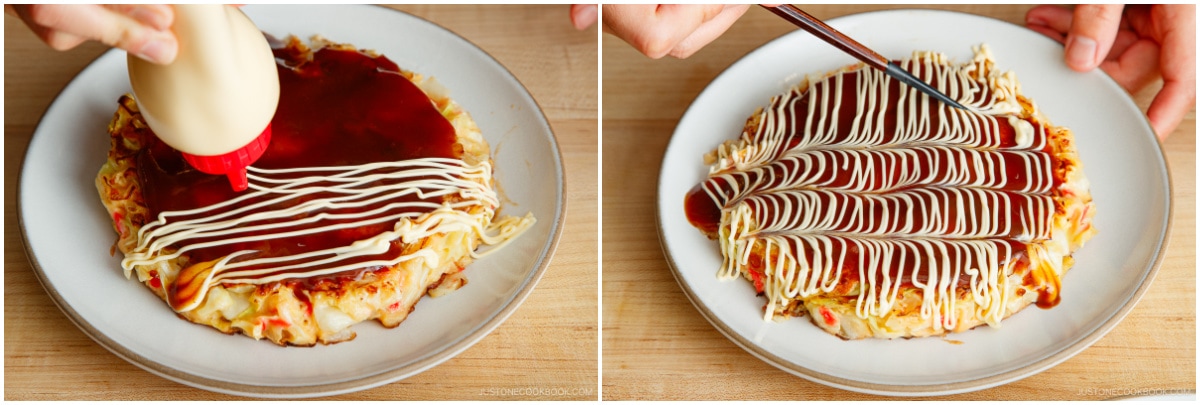
Step 21: If desired, drizzle Japanese Kewpie mayonnaise in a zigzag pattern. Drag a chopstick tip through it every ½ inch (1.3 cm) to create the patterned finish.
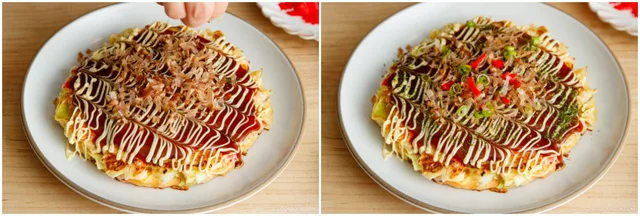
Step 22: If desired, sprinkle with katsuobushi, aonori, and chopped green onions / scallions. Garnish with the remaining one-third of the chopped pickled red ginger.
Photos (1)
Comments
0 threadsSign in to join the discussion.

No comments yet. Start the discussion.