

Cantonese · Dinner
The Hong Kong Style Noodles My Dad's Made 100,000 Times
From the zcook collection
Learn how to make Hong Kong Style Noodles from a 2x James Beard Award Winning Chinese Chef with 60+ years of experience
- Dairy-free
- main course
- hong kong noodles
- Cantonese
- Total
- 1 hr
- Prep
- 30 min
- Cook
- 30 min
- Serves
- 4
- Level
- Hard
- Energy
- 580 kcal
Method7 steps · about 1 hr
Step 1: Choose ONE preparation route for your 12 oz HK-style noodles; do not perform all three: • fresh, unsteamed • fresh, steamed • dried In the video, we demonstrate how to cook with fresh, unsteamed noodles (which is my dad's preference). This takes a little bit of extra work but it's worth it. We'll need to cook the noodles by steaming them, which is one of the main keys to nailing the perfect texture. Here's what you do: • Place your steamer rack in a wok on high heat. Pour enough water so that the top of the rack isn't submerged, and start boiling water. • Take the rack out, separate, and lay out the noodles on top of the rack. • Fresh unsteamed route: once boiling, set the steamer rack and noodles back in the wok and cover for 10 minutes. Leave the stove on high heat. • If you're using a steamer rack without holes (i.e. steaming on a plate where the steam can't easily access the bottom, steam for 2-3 extra minutes.) • Once the 10 minutes is up, quickly dump the noodles in the water for 15-30 seconds. • Drain the noodles through a colander, and spend about 1-2 minutes fluffing and separating the noodles with chopsticks. • Let it cool for 3-5 minutes. Fresh steamed route: skip the preceding steaming preparation. Instead, dunk the noodles in boiling water for about 2 minutes before draining. Dried-noodle route: skip both fresh-noodle routes. Cook according to the package's instructions, erring on the more al-dente side, and rinse with cold water afterward to stop the cooking.
Step 2: We'll be washing and cutting our vegetables: • bok choy (8 oz): cut into quarters for bigger pieces, halves for smaller pieces. We don't need to cut off the stem. • white mushroom (3 oz): cut away the stem, and cut in halves • carrot (1 oz): cut into about 2mm thick slices. • ginger (2 slices): cut into about 2mm thick slices, and cut into little triangles. • green onion (1 piece): cut only the white part into about 1-inch pieces and reserve the green part for another dish. It's a stylistic thing but my dad cuts them diagonally. The amounts are very flexible! If you make more than you can fit on your eventual noodle pancake, then you can also eat it separately. For the chicken (4 oz), we'll cut it into slices against the grain. Marinate it with the chicken's 1 tsp cornstarch, 1 tsp water and 1/4 tsp salt. Stir the cornstarch slurry and chicken for about 30 seconds until the chicken is evenly coated. Assuming you bought peeled, deveined shrimp (6 oz), you don't need to do anything extra to them.
Step 3: Next, we'll heat our pan on high heat for about 2-3 minutes. If you're using a non-stick pan like the one pictured, use medium-high heat to help protect the non-stick coating. Then, we'll add 1 tbsp corn oil. Swirl it around the pan and let the oil heat up until it's shimmering, or forming ripples across the surface. Add the noodles to the pan. For the noodles, we want each side to become a crispy golden brown. We'll cook each side for about 7-10 minutes, occasionally turning the noodles but not stirring or breaking into the layers. After flipping, we'll add the remaining 1 tbsp corn oil to the rim of the noodles, so that this new side also gets a nice crisp. After the second side has turned golden & crispy, transfer the noodles onto a plate. My dad explains this in the video, but he turns the noodles occasionally because most pans and stoves have uneven heat distribution. Turning helps ensure that the entire surface of the noodles gets evenly crispy. Typically, restaurants use a ton of oil, even deep-frying the noodles. The cooking time is much quicker at restaurants with more oil and roaring stoves. At home, we can make a healthier version with less oil and longer cooking times, since we're not rushed to serve a ton of customers.
Step 4: Using the residual oil in the same pan, add the prepared marinated chicken, and cook for about 1 minute before adding the other ingredients. Scoot the chicken off to one side, and add the ginger and green onions. Let the ginger and green onions cook for about 45-60 seconds before adding the shrimp (6 oz). Add the shrimp, and cook for about a minute until it starts turning orange. For this step, the chicken and shrimp don't yet need to be fully cooked, because we'll still be cooking everything more later. Transfer the chicken, shrimp and aromatics into a bowl and proceed directly to the vegetable and gravy phases; they finish cooking there.
Step 5: We don't need to add additional oil, since there's already some in the pan. Place the bok choy, mushrooms, and carrots into the pan, along with the separate 12 oz boiling water for vegetables/gravy. Cover the pan and let the vegetables cook for about 4 minutes.
Step 6: Return the partially cooked chicken, shrimp and aromatics to the pan of cooked vegetables and liquid. Add the gravy's 1/2 tsp salt, 3/4 tsp sugar, 1 tsp chicken bouillon and 1 tbsp oyster sauce. Mix the gravy's 1 1/2 tbsp cornstarch with its separate 1 tbsp water until evenly dispersed, then add gradually while stirring. Bring the gravy to a gentle simmer, stirring until thickened and the chicken centre reaches 74°C/165°F and the shrimp are firm and opaque throughout; continue cooking as needed. Use only the slurry needed for your preferred consistency and reserve excess. If more thickening is needed, disperse a little optional extra cornstarch in a small amount of liquid from the pan before stirring it in. Finish with 1 tsp sesame oil.
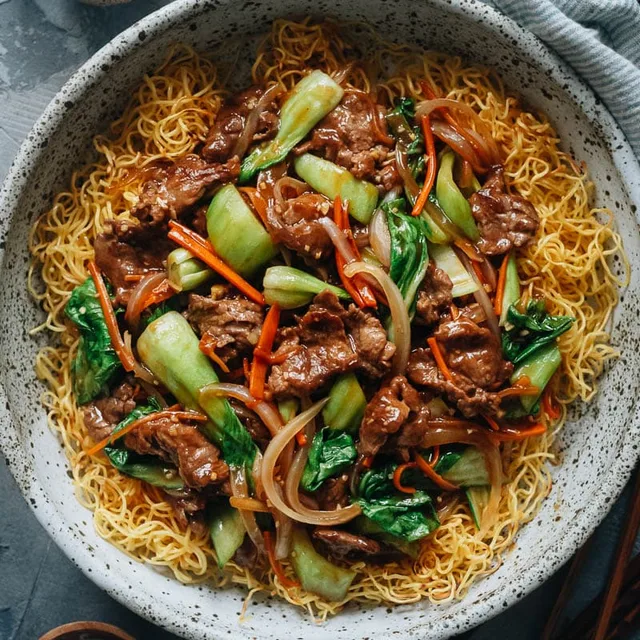
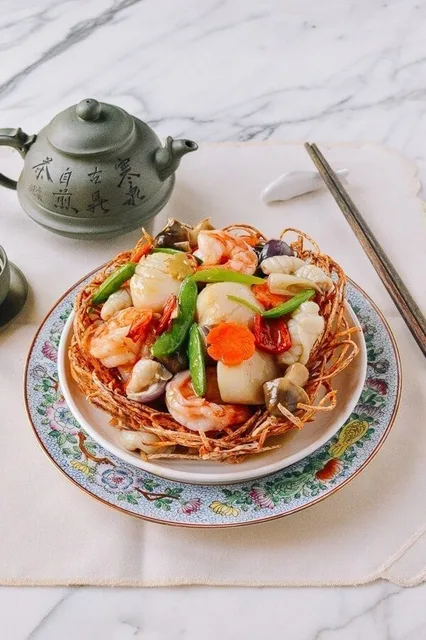
Step 7: Transfer the vegetables, meats, and gravy onto the noodles! It's time to eat :) It's best to eat this as soon as possible since the sauce will inevitably make the noodles soggier over time.
Photos (1)
Comments
0 threadsSign in to join the discussion.

No comments yet. Start the discussion.