
Syrian · Dinner
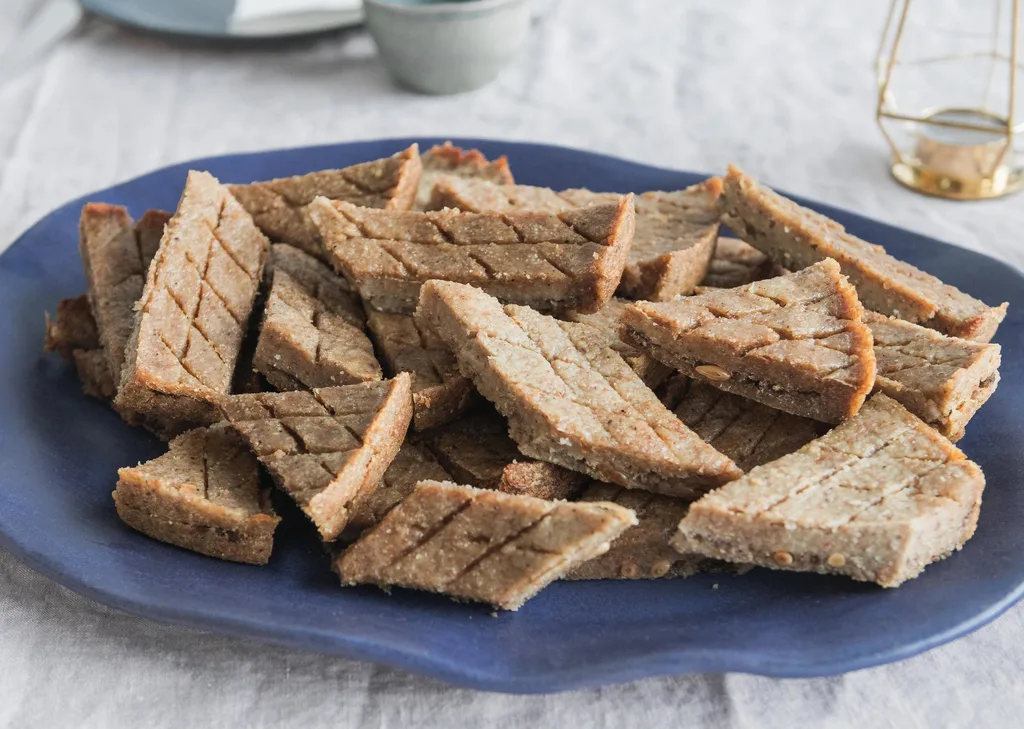
Kibbeh bil Sanieh (Baked Kibbeh)
From the zcook collection
Syrian baked kibbeh in a 10-inch round pan: a fat-free beef and fine-bulgur shell surrounds cooked spiced beef and toasted pine nuts. Cut into eight wedges; the source gives about 2–4 meal portions.
- Syrian
- Dinner
- Kibbeh
- Serves
- 2–4 meal portions; 8 wedges
- Level
- Medium
Method22 steps
Step 1: Cook ALL ½ lb filling ground beef in a pan, breaking it up constantly until fully cooked and no released liquid remains. Check it reaches 71°C (160°F). Season with ALL 2 teaspoons seven-spice blend and the separate filling salt and pepper to taste; keep the measured 2 teaspoons SHELL salt for stages 3–4. Let the cooked filling cool. It may be prepared up to 2 days ahead if refrigerated promptly in a shallow covered container, within 2 hours, at 4°C or colder.
Step 2: Preheat the oven to 350°F. Spread ALL ¼ cup ghee across the bottom of a 10-inch round roasting pan. Reserve this prepared ghee-lined pan for the shell layers.
Step 3: In a food processor, combine ALL the 1 lb cold habra, the baking soda (1 tsp), ONLY 1 teaspoon of the divided shell salt (1 teaspoon), the shell black pepper and both shell-paste ice cubes (2). Process until a smooth combined meat paste forms; transfer ALL the actual paste to a bowl. Clean the food-processor bowl before stage 4. Keep raw meat cold and do not taste it raw.
Step 4: Wash the ¾ lb fine bulgur with water and squeeze dry, discarding the washing water. In the cleaned food-processor bowl, combine ALL this actual washed, squeezed bulgur with the chopped small onion (1 small) and ONLY the remaining 1 teaspoon shell salt. Process until combined. The separate filling salt does not enter this shell mixture.
Step 5: Put ALL the actual habra paste from stage 3 and ALL the actual bulgur-onion mixture from stage 4 into the bowl of a stand mixer fitted with a paddle attachment.
Step 6: Mix the complete actual shell mixture from stage 5 on medium-high until combined, about 3 minutes. Keep this entire raw kibbeh shell-dough supply cold.
Step 7: Meanwhile, prepare a small clean bowl of ice water using additional ice. This handling-water supply is separate from the two ice cubes already processed into the shell paste.
Step 8: Once the actual shell dough from stage 6 is combined, tip ALL of it onto a tray next to the workspace. Keep the raw dough cold while forming the bottom and top layers.
Step 9: Wet your hands with ice water. Take ONE handful of the actual shell dough from stage 8, flatten it between your palms and press it into the prepared ghee-lined pan from stage 2, aiming for a bottom layer about ⅛ inch thick. Keep the rest of the shell dough reserved.
Step 10: Repeat stage 9 with further handfuls from the SAME actual shell-dough supply from stage 8 until the bottom of the pan is fully covered at about ⅛ inch thickness. Reserve all remaining actual shell dough for the top layer and gap filling in stages 12–15; the bottom-layer share is not specified.
Step 11: Spread ALL the actual cooled, cooked beef filling from stage 1 evenly over the actual bottom shell layer from stage 10. Add ALL ¼ cup ready toasted pine nuts and press them into the filling layer. The raw shell is baked later.
Step 12: Wet your hands with ice water and knead ONLY the actual shell dough remaining after the bottom layer from stage 10, until soft, about 3–5 minutes. This remaining prepared supply is for the top layer and any gaps; keep it cold.
Step 13: Take ONE handful from the actual softened remaining shell dough from stage 12 and press it between your palms until about ¼ inch thick.
Step 14: Place the actual flattened shell piece from stage 13 over the filled pan from stage 11, starting at the edge. Repeat with further portions from the SAME actual softened dough supply from stage 12, working toward the center. Reserve any small amount needed to patch gaps next; do not make a second shell-dough batch.
Step 15: Patch any gaps in the actual assembled top layer from stage 14 with remaining actual softened shell dough from stage 12, so the cooked filling is completely covered. Use the remaining shell supply as needed without adding new raw meat or bulgur.
Step 16: Wet your hands with ice water and press the actual fully covered kibbeh from stage 15 together so the layers adhere. Wet your hands again and smooth the top until even.
Step 17: Cut the actual smoothed kibbeh round from stage 16 into EIGHT wedges, taking the knife all the way through. These are eight cut pieces, not a source claim of eight meal servings.
Step 18: Score the top of the actual cut kibbeh from stage 17 for crosshatches, keeping these decorative cuts shallow so they do not cut through the top layer.
Step 19: On the actual scored round from stage 18, make parallel shallow scores across each triangular wedge and move clockwise around the pan.
Step 20: After the clockwise scores, repeat shallow scoring counterclockwise on the SAME actual round from stage 19 to complete the crosshatches.
Step 21: Top ALL the actual assembled and crosshatched kibbeh from stage 20 with ALL ½ cup vegetable oil. Bake at 350°F for about 20–30 minutes, until browned AND cooked through. Check the raw ground-beef shell at the center reaches 71°C (160°F); continue as needed rather than relying only on browning. Let cool slightly, then cut through the existing wedges to release the pieces from the pan.
Step 22: Serve the actual baked kibbeh from stage 21 promptly, warm or briefly at room temperature, with optional separately ready muhammara OR plain yogurt. The complete round makes about 2–4 meal portions across its eight wedges. For leftovers, refrigerate promptly in shallow covered containers, within 2 hours, at 4°C or colder and use within 3–4 days; freeze for longer storage. Reheat actual refrigerated portions throughout to 74°C (165°F).
Photos (1)
Comments
0 threadsSign in to join the discussion.


No comments yet. Start the discussion.